
Extended gamut profiles in Gum printing
Why do CMYK+ conversions?
I have found that I get my best color gum prints when I do five or more color separations. This involves using extended gamut color conversions of my 3-color RGB digital files. Partly this is due to the type of color images that I like to make - darker earth-tones are a favorite of mine, and getting balanced color with just a CMYK conversion is challenging given the inherent variability in a hand coated process like gum bichromate. Small changes in coating thickness of a given layer can have a pronounced effect on the color balance of the finished image. With just three primary colors to use, I can often end up chasing my tail with many adjustment layers to get the colors the way I want them to appear.
Getting extended gamut profiles
Calvin Grier of “The Wet Print” is a color wizard in the alternative process community, and he recommends using an additional layer of iron oxide to help balance colors more easily. This approach is particularly useful for images that contain skin tones which are notoriously difficult to get right in gum printing.
Calvin has generously offered free downloads for some of the custom CMYK and extended gamut color profiles he has created for his Printmaker’s Friend non-toxic gum substitute. These color profiles can also be used for traditional gum bichromate. They can be accessed here and then selecting the ‘Imagesetter Negatives’ tab and scrolling to the bottom. Pay careful attention to the target LAB values he has for each profile. These values indicate the target maximum density on each color separation. Your combination of negative, pigment concentration, and exposure should yield these values if you want to get the best match with his profiles.
Modifying channel names in extended gamut profiles
One issue with his CMYK+Iron Oxide profile is that the process Calvin goes through to create the profile necessitates that the Iron Oxide channel is used as a Yellow pigment and the regular Yellow is put into an ‘Extended gamut Yellow’ channel. These names are embedded in the profile and may confuse you when you begin your color separation process. To reduce confusion with the channel names, I have created a little Photoshop script utility that allows you to manually rename both the channels labels (called colorants in the script) and the profile description before you copy it to the correct destination folder.
This script can be accessed on here. To use this script, unzip the download file, and copy the ICC-editor.jsxbin file into the Applications/Adobe Photoshop 20XX/Presets/Scripts folder. Restart Photoshop if it is running, and the script will now be accessible by clicking the File->Scripts selection.
It is best to modify the channel names and description before copying it to the final location for color profiles. The desktop is a good spot to drop the file to be modified.
Start the script by clicking File->Scripts->ICC-editor with your mouse and the following window will present itself:

Choose the metadata in the profile you wish to modify. If Edit Description is chosen, then this window will appear:

Edit the description as you wish. The description will be the new filename for the modified ICC profile, so concision and brevity for this text field is advisable. Click ‘OK’ to finish editing this metadata field.
Next you may want to modify the channel (colorant) names. In the case of the Iron Oxide .icc profile, the Iron Oxide channel is actually labeled as ‘Yellow’ in the colorant table, and the actual Yellow channel is labeled as ‘Extended Gamut Yellow’. Click ‘Edit Colorant names’ and a dialog will open with all of the channels that the profile creates:

The current names are in grayed-out text in this dialog. To modify a channel (colorant) name, click on the colorant to be modified and type in a new name. Change any others you need to change. The edited colors will be in full contrast. Click OK to save these changes to the profile metadata.
You will now be back at the main dialog, and the edited metadata fields will have an asterisk after then on the button indicating they have been modified:

Clicking ‘Save’ in this dialog will suggest saving the modified profile to a folder named ‘output’ at the same location as the original ICC profile is located. You can use the file picker dialog to choose another location if you want. You will be presented with a final file save confirmation dialog after ‘Save’ is clicked:

Copy the modified profile to a folder where Photoshop can find them. On macOS, this location is Library/Application Support/Adobe/Color/Profiles.
Open the image file that you are working with in Photoshop, and then select Edit->Convert to Profile.... Because we are using an extended gamut profile, the ‘Advanced’ button must be clicked on the upper right-hand side of the dialog, and then an option for ‘Multichannel’ will appear. Click the selection box arrow and select the profile you want to use for the conversion.
For an extended gamut conversion such as RGB to CMYK+Iron Oxide (Cyan, Magenta, Yellow, Black, Iron Oxide), select the Multichannel option and then select the target output .icc profile:

One thing to be aware of is that the Multichannel options create separate channels that are essentially spot colors for each of the selected colors. Photoshop’s color engine cannot accurately convert these spot channels to the computer display’s color profile, so the results on screen will look weird. Here is an example of an input RGB color file that is to be converted to a multi-channel output:

Once the file has been converted to the 5-color CMYK+IO profile, the image looks like this:
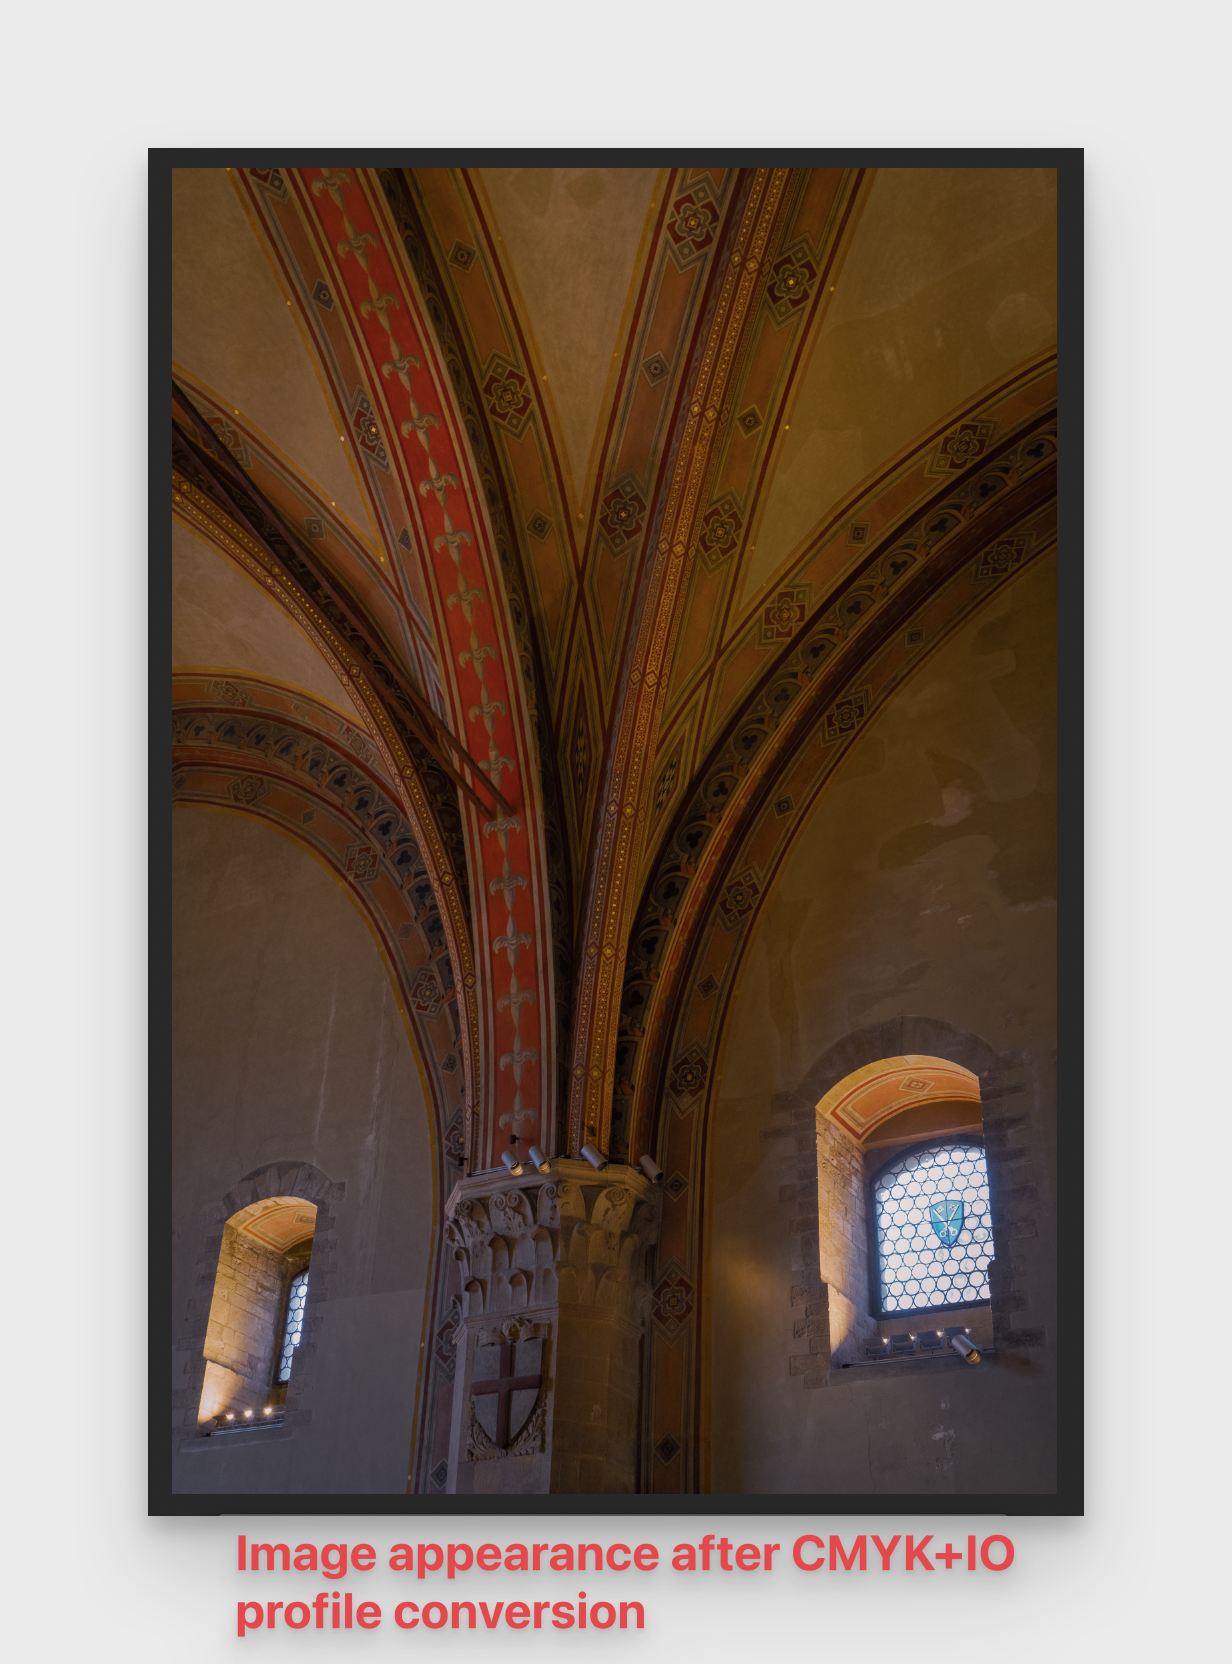
This looks weird, but if the separations are done using the extended gamut profile, and then printed, the results should look like the original image.
This may seem to be a lot of trouble for a color gum print. The need for extended gamut profile is certainly image dependent. But if you have images that contain earth tones and skin tones, this extra step is certainly worth it to be able to get the final print looking like you want it to.