Mangling Color: separation neg best practices
Why do CMYK and CMYK+ conversions?
I have found that I get my best color gum prints when I do four or more color separations. This involves using CMYK or extended gamut color conversions of my 3-color RGB digital files. At first glance, this would seem straightforward: just use the ACE (Adobe Color Engine) to convert a file to a target .icc or .icm color format. The devil is in the details, of course, and when converting noisy, underexposed, and heavily edited low-light images, it is easy to run headlong into significant pattern and banding noise on some of the output color channels when using a conversion workflow that does not take into account the non-linearity inherent in any conversion that is not in the native file’s 3-color space.
Evil lurks in the shadows
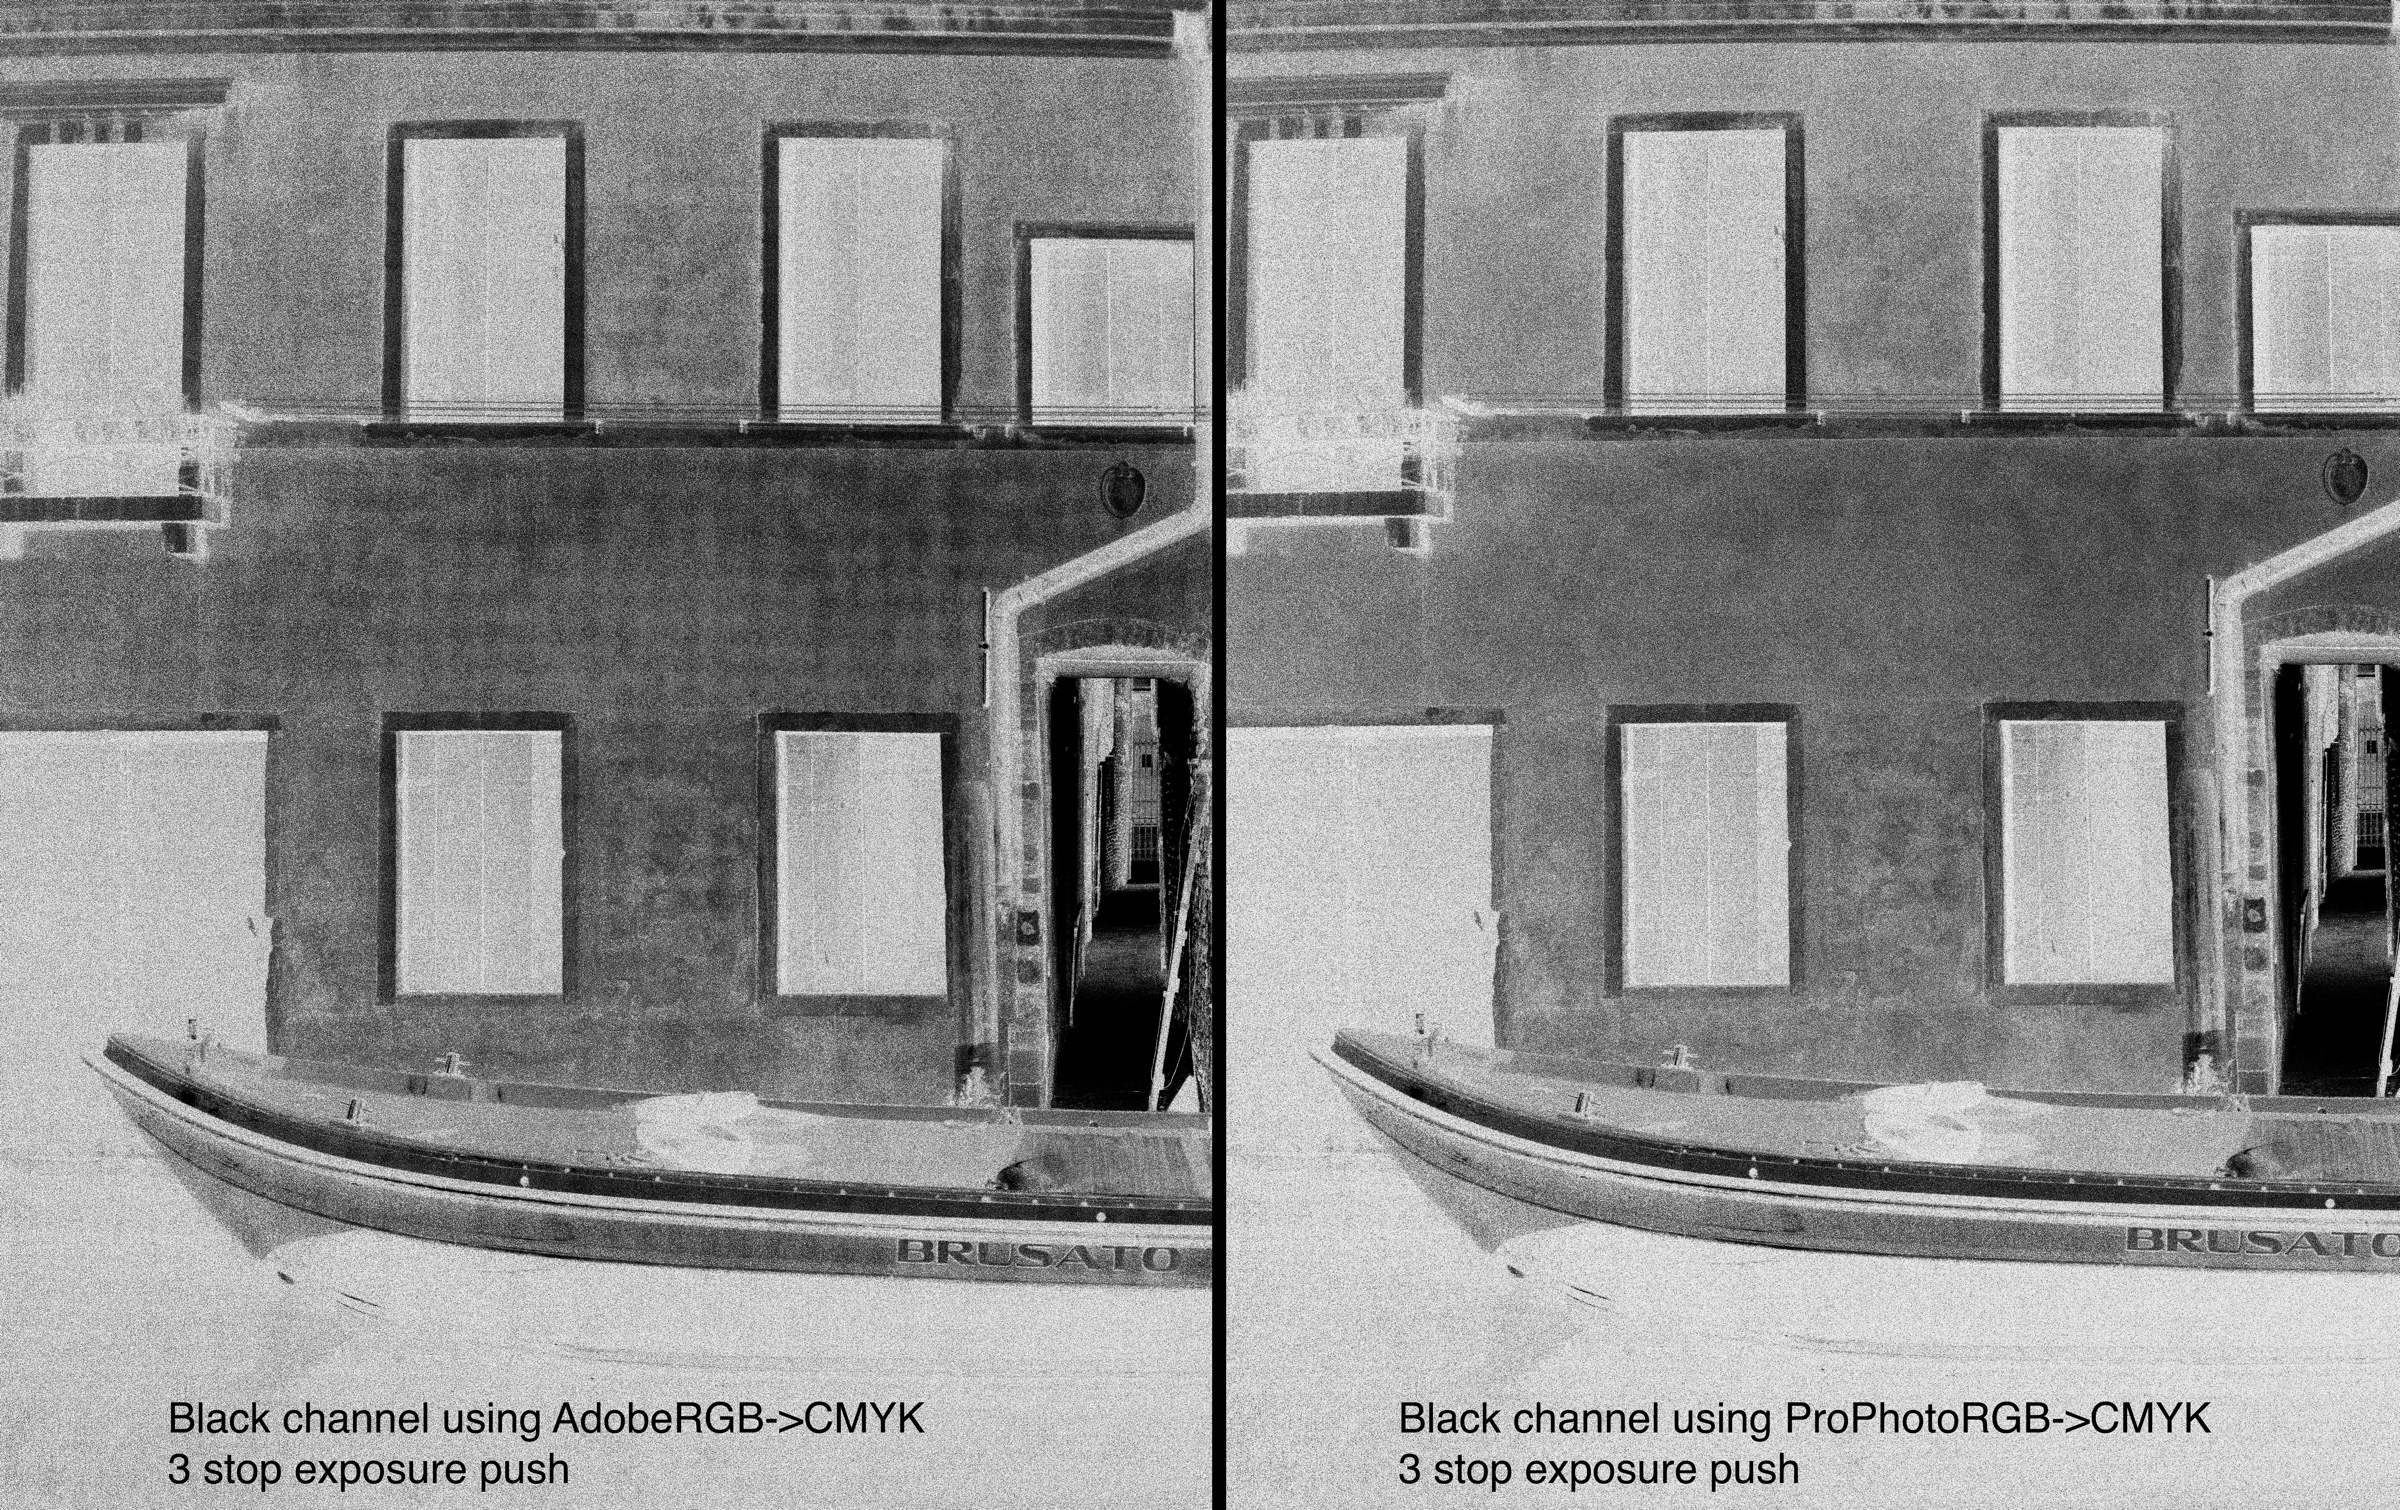
I had an image that I had severely underexposed and required a 3-stop exposure increase in Lightroom, and when I exported it using AdobeRGB as the output color space, I noticed significant banding on several of the channels. After investigation, I discovered the reason for this is that AdobeRGB->CMYK conversions involve some compression of values in the dark areas, and quantization errors get magnified when converting from a 3-color space to a 4-color space such as CMYK. Maintaining the perceptually linear ProPhoto RGB color profile through the entire editing pipeline prior to conversion to CMYK solved the problem.

Do this
If your attention span has been hopelessly Instagrammed, here is the short version: Always import your RAW camera files into Lightroom using a perceptually linear color space conversion. Your best option is to use ProPhoto RGB (the default colorspace in Adobe Lightroom), or perhaps ACEScg. When exporting to Photoshop for the color separation step, always export the file in this same perceptually linear color space at 16 bits! This will greatly reduce, although probably not completely eliminate, the pattern noise in the darkest areas of the image. The improvement will be very noticeable in the K (black) channel which seems to accrete all the sensor’s pattern noise into a steaming pile of…
One very important lesson to learn from this is that you should always be shooting in a RAW format, which gives you flexibility in this file conversion pipeline. Most phone cameras now have a RAW format, and you should be using this for any low-light image that you eventually may want to print in color gum.
Another interesting discovery I have made that may ultimately be an Adobe bug: I get slightly different results when I export a file from Lightroom than one that I export from Adobe Bridge when using the same AdobeRGB output!
I have gone down a rabbit hole on this whole color conversion process over the last two days and my biggest takeaway is that from now on I am changing my default editing space in Photoshop to ProPhoto RGB. This colorspace is the least problematic and has given me the cleanest separations.
Any time that your image file is converted from one color space to another there is potential for digital mischief to occur. The problems tend to snowball if the image processing sequence stretches or squeezes the information in the image file in any way.
Recommended workflow for CMYK and CMYK+ separations
-
Convert raw files into a perceptually linear color space for editing. ProPhoto RGB is the easily available recommendation for this. Maintain ProPhoto RGB through the entire process until ready for conversion to your destination color space. Change color settings in Photoshop to default to ProPhoto RGB for all editing. Never export a file as 8 bits!
-
Do all noise reduction and editing in ProPhoto RGB. When ready to convert to CMYK or CMYK+, Select Image->Convert to Profile, and select the output profile you want to create for your separations. The image will probably change slightly. Use curve adjustments on each channel to get the image colors exactly the way you want them to appear.
-
Run the CMYK Separation Negs script on the converted file.
CMYK and extended gamut ICC profiles
Calvin Grier is one of the most technically accomplished color alt-process printers around, and he has generously offered free downloads for some of the custom CMYK and extended gamut color profiles he has created. They can be accessed here and then selecting the ‘Imagesetter Negatives’ tab and scrolling to the bottom. Pay careful attention to the target LAB values he has for each profile. These values indicate the target maximum density on each color separation. Your combination of negative, pigment concentration, and exposure should yield these values if you want to get the best match with his profiles.
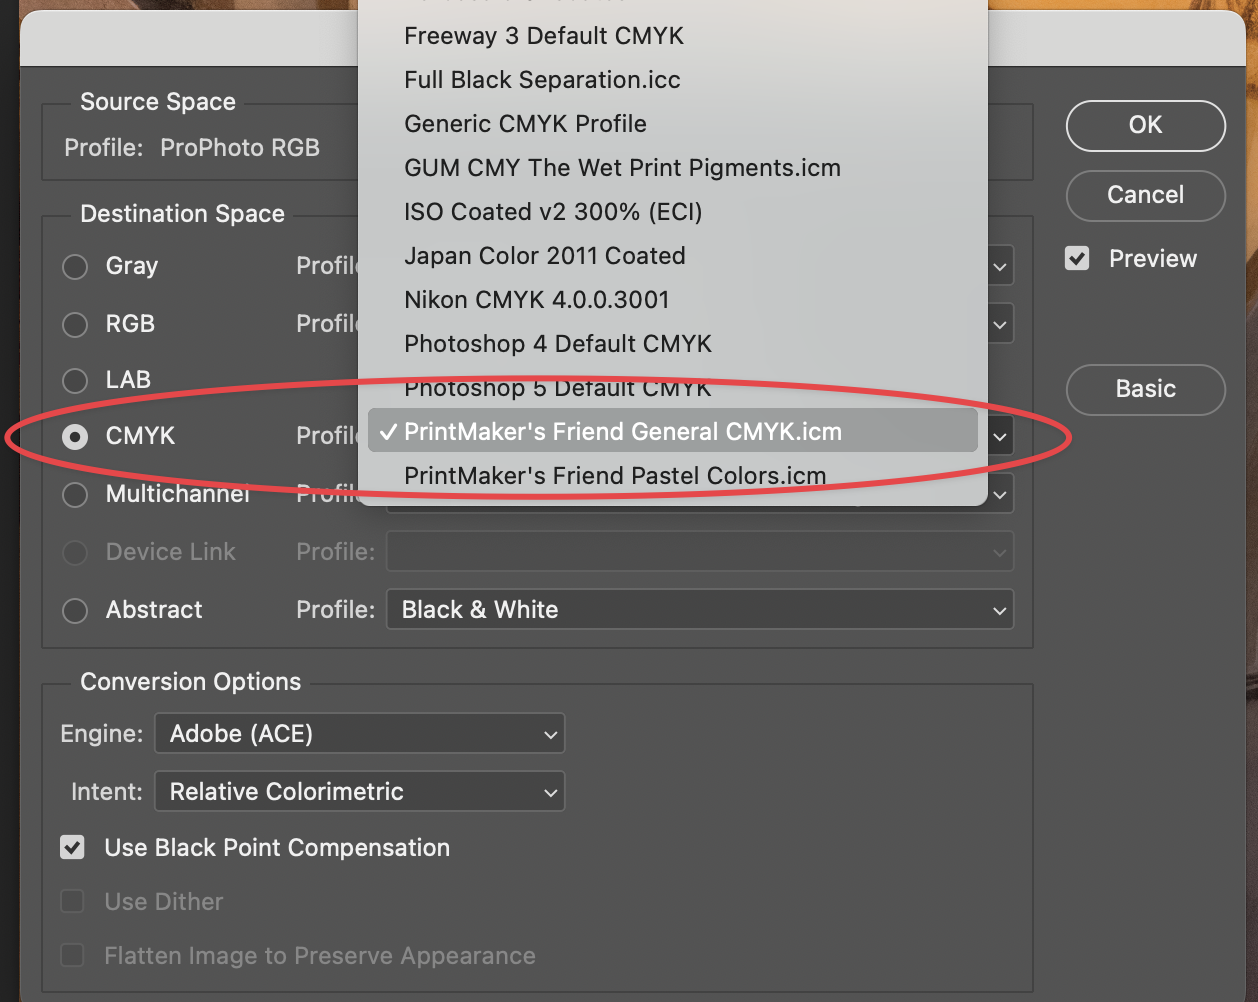
To use any of these profiles, download, unzip, and then copy the files to the folder where Photoshop can find them. On macOS, this is Library/ColorSync/Profiles. Open the image file that you are working with in Photoshop, and then select Edit->Convert to Profile...
For a straight 3-color to 4-color conversion (RGB->CMYK), you should select the radio button for CMYK conversion on the left side of the dialog, and then select the CMYK .icc profile you want to use for the conversion:

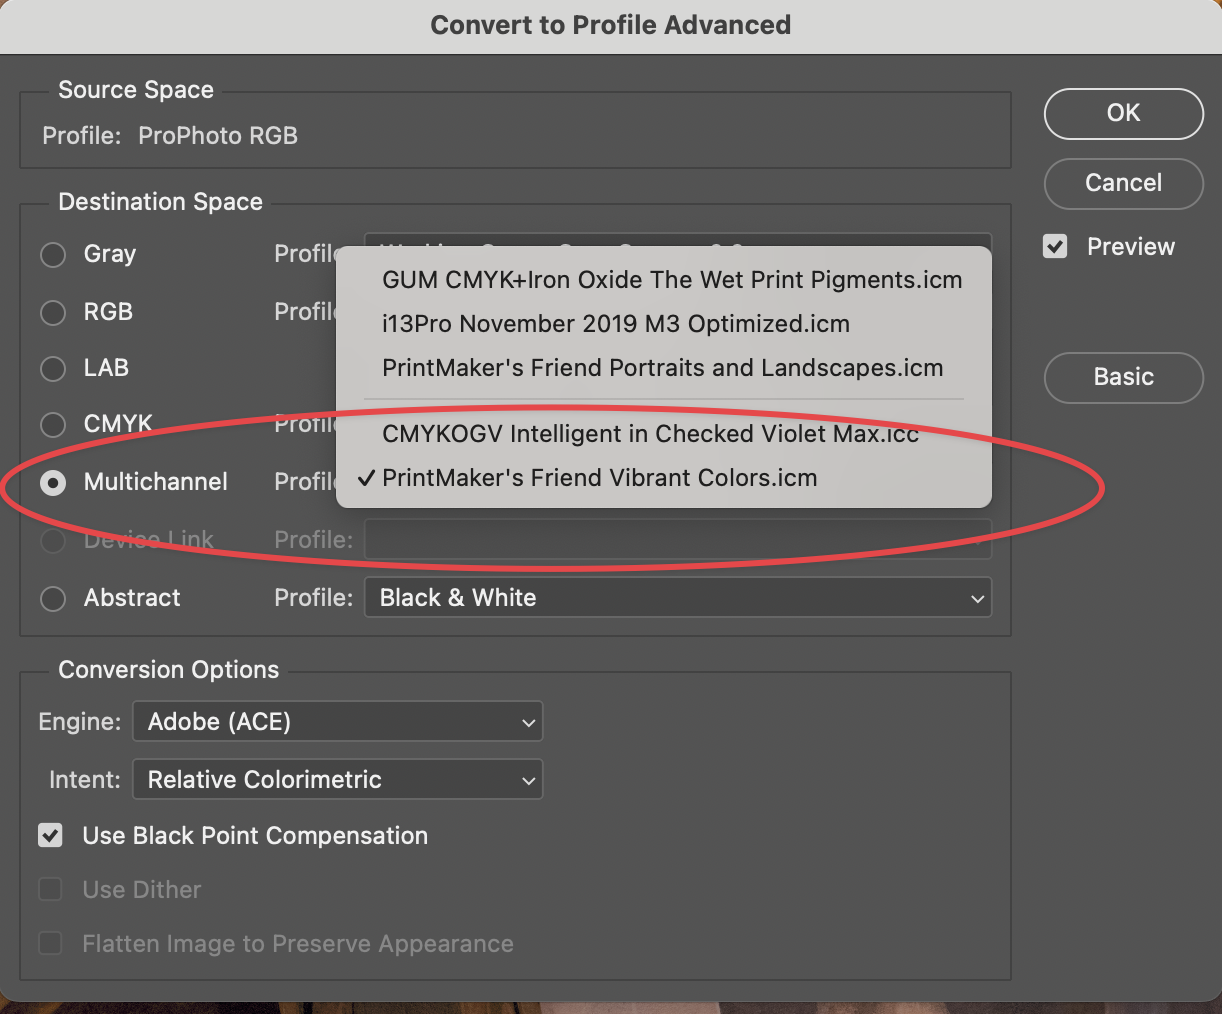
For an extended gamut conversion such as RGB to CMYKOGV (Cyan, Magenta, Yellow, Black, Orange, Green, Violet), select the Multichannel option and then select the target output .icc profile:

One thing to be aware of is that the Multichannel options create separate channels that are essentially spot colors for each of the selected colors. Chances are these extended gamut options will muck around with the appearance of your color image. The reason this occurs is that the Photoshop color engine cannot accurately convert multichannel colors back into the RGB display space of the computer monitor. The results will look weird on the screen, but should print accurately once the separations are made and printed in the color process you are using.
