Color Muse: an inexpensive colorimeter to use for digital negatives
Color Muse is an inexpensive handheld colorimeter that allows the photographer making digital negatives and positives the ability to measure LAB values from step tests to be used in programs such as QuadToneProfiler QuickCurveDN.
Overview
This tiny little colorimeter is a great tool for photographers looking for an inexpensive device that will generate LAB values. It has a downloadable app that is installed on your smartphone, and the phone pairs with device via Bluetooth.
The device is charged using a USB cable with a micro-USB connector. One charge seems to last quite a while, but it will discharge over time and will probably need to be recharged if it has been sitting on your shelf for a few months.
Advantages
- Inexpensive relative to a professional colorimeter
- Portable and easy to carry
- Charges with any USB source with a micro-USB connector
Disadvantages
-
Not intended for photography - LAB values must be read from the phone app and then transcribed to a text file which is then processed using QTR-Data-Tool. This can seem tedious, but in practice is only done occasionally when calibrating a new process. I have created a little web tool that you can use for data entry and it copies the formatted data to the clipboard for subsequent pasting into a plain text file.
-
Measuring the exact target can be difficult. The targets need larger squares than the downloadable target image files typically provide. It can be difficult to know if you are measuring the exact square for a series of targets. Below, I will have a download link to a 40-step target with squares that are easy to measure with the Color Muse.
Using the Color Muse for digital negative and positive linearization
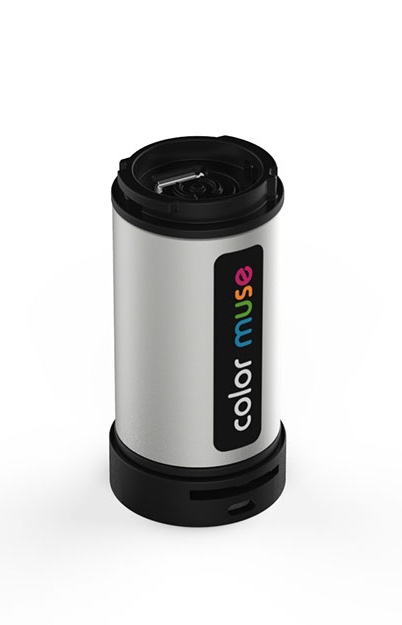
The device itself is very small. It is a tube that is about 1-1/2 inches tall and 3/4 inch in diameter. It has a built in calibration plaque in the cover for the sensor. Here is what it looks like:
Download the Color Muse app from whatever App Store your smartphone requires. After the Color Muse has been charged, open the app on your smartphone and pair the Color Muse with your smartphone using the pairing function on the app.
Recording the data from Color Muse for linearization
Prepare to record the values from Color Muse using TextEdit
The following instructions assume you are using a Macintosh computer since that is the only system that QuadToneProfiler QuickCurveDN runs on at this time.
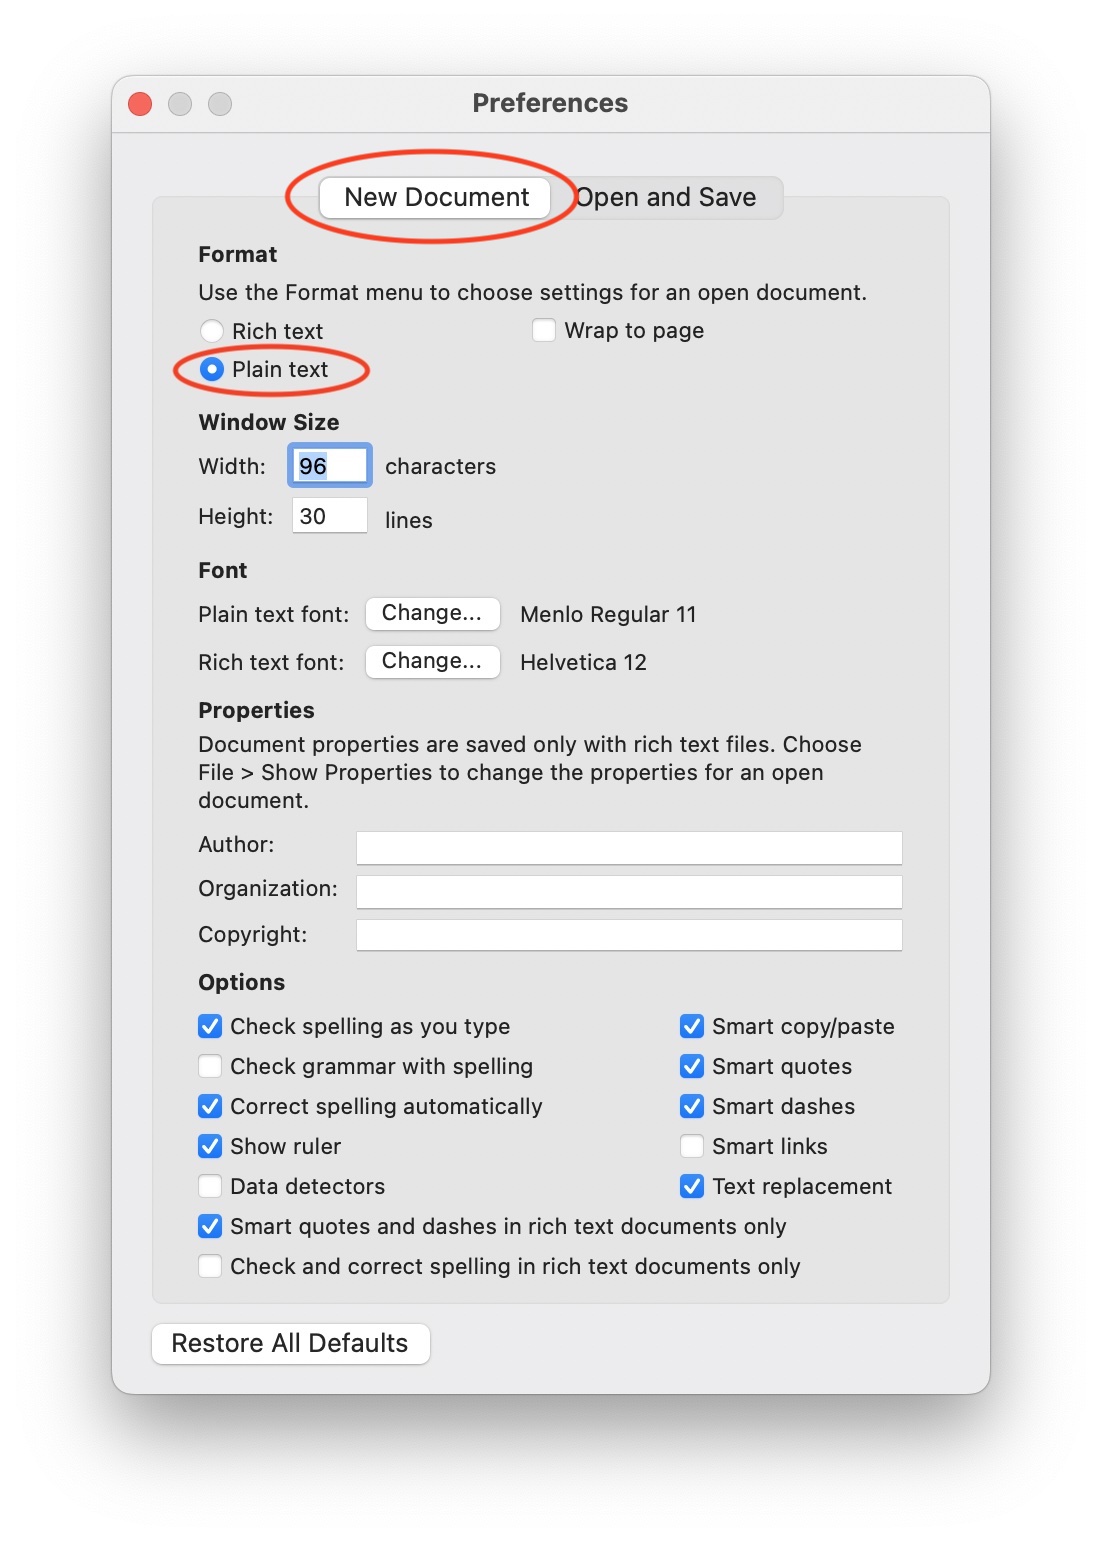
Open up the TextEdit app. By default, TextEdit is set to write files using the .rtf file format. This is a rich-text file format that contains information that can format text with different fonts and other visual attributes. We do not want to create a file in this format, so the first order of business is to set the Preferences in TextEdit so that the default format is plain text without any additional formatting codes embedded in the file.
Click the TextEdit->Preferences… menu item with your mouse. A Preferences dialog box will open. This box has two tabs. In the first tab titled ‘New Document’, change the Format selection button to Plain text instead of ‘Rich text’.:
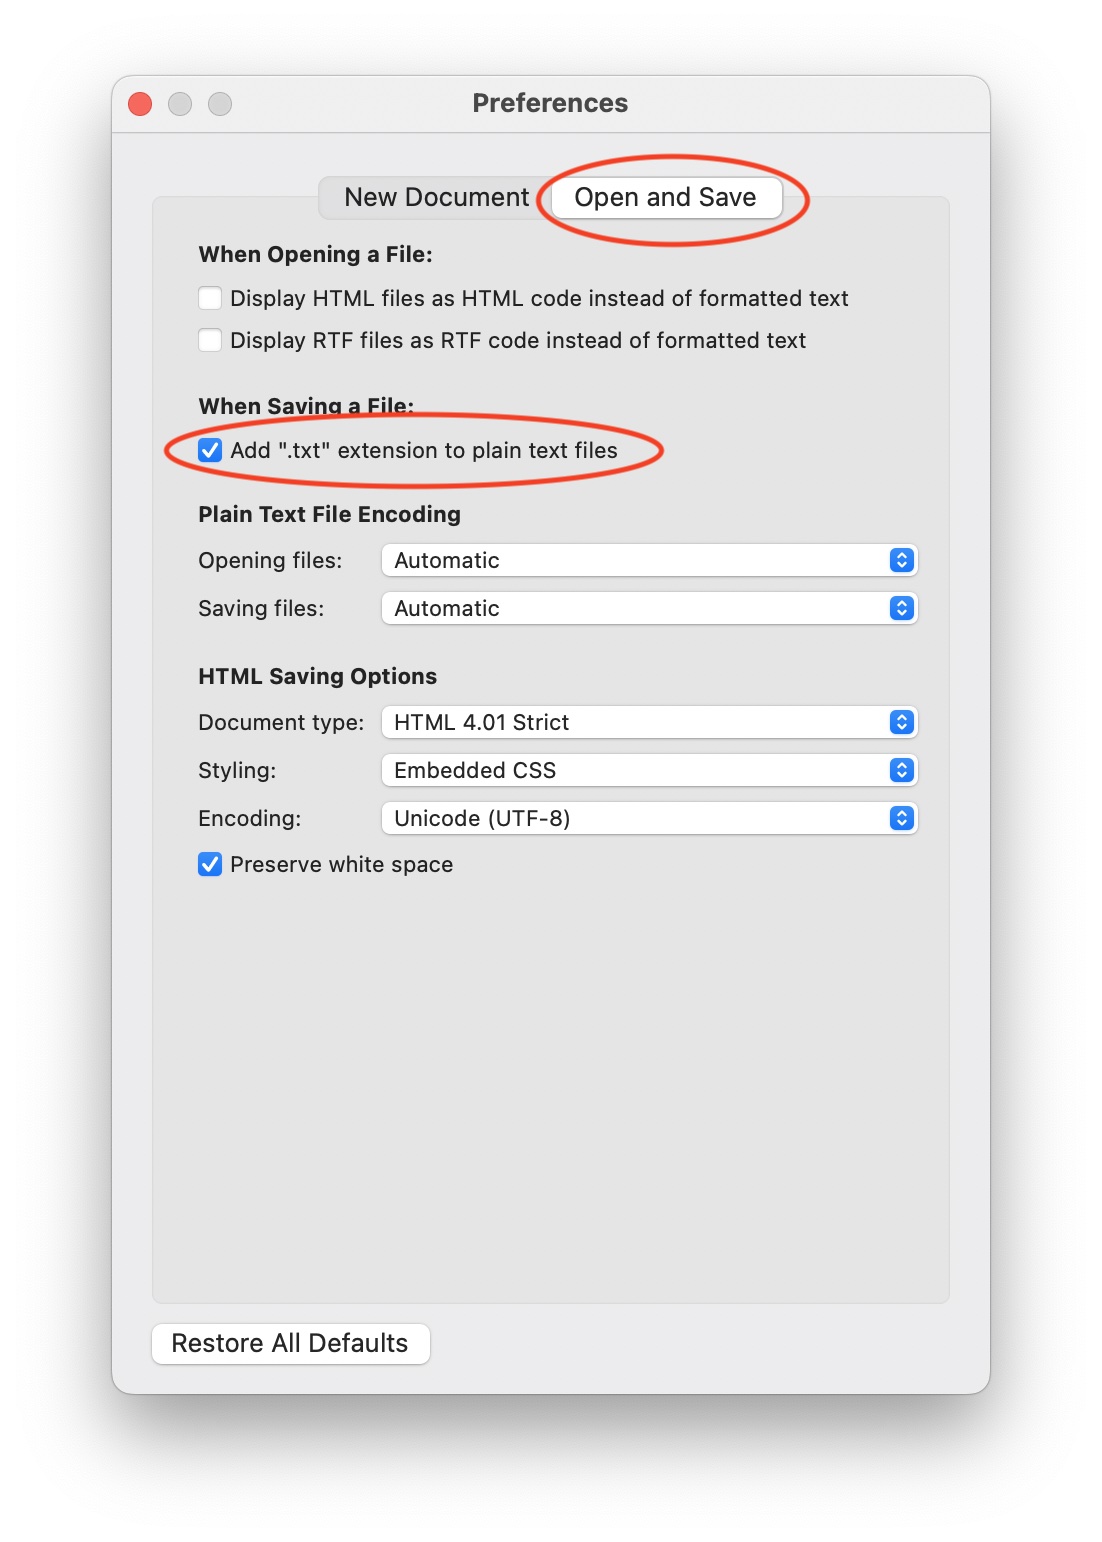
Now click on the ‘Open and Save’ tab in this dialog box, and in the When Saving a File section, click the button that is titled ‘Add “.txt” extension to plain text files’:
Print a test target that the Color Muse can easily read
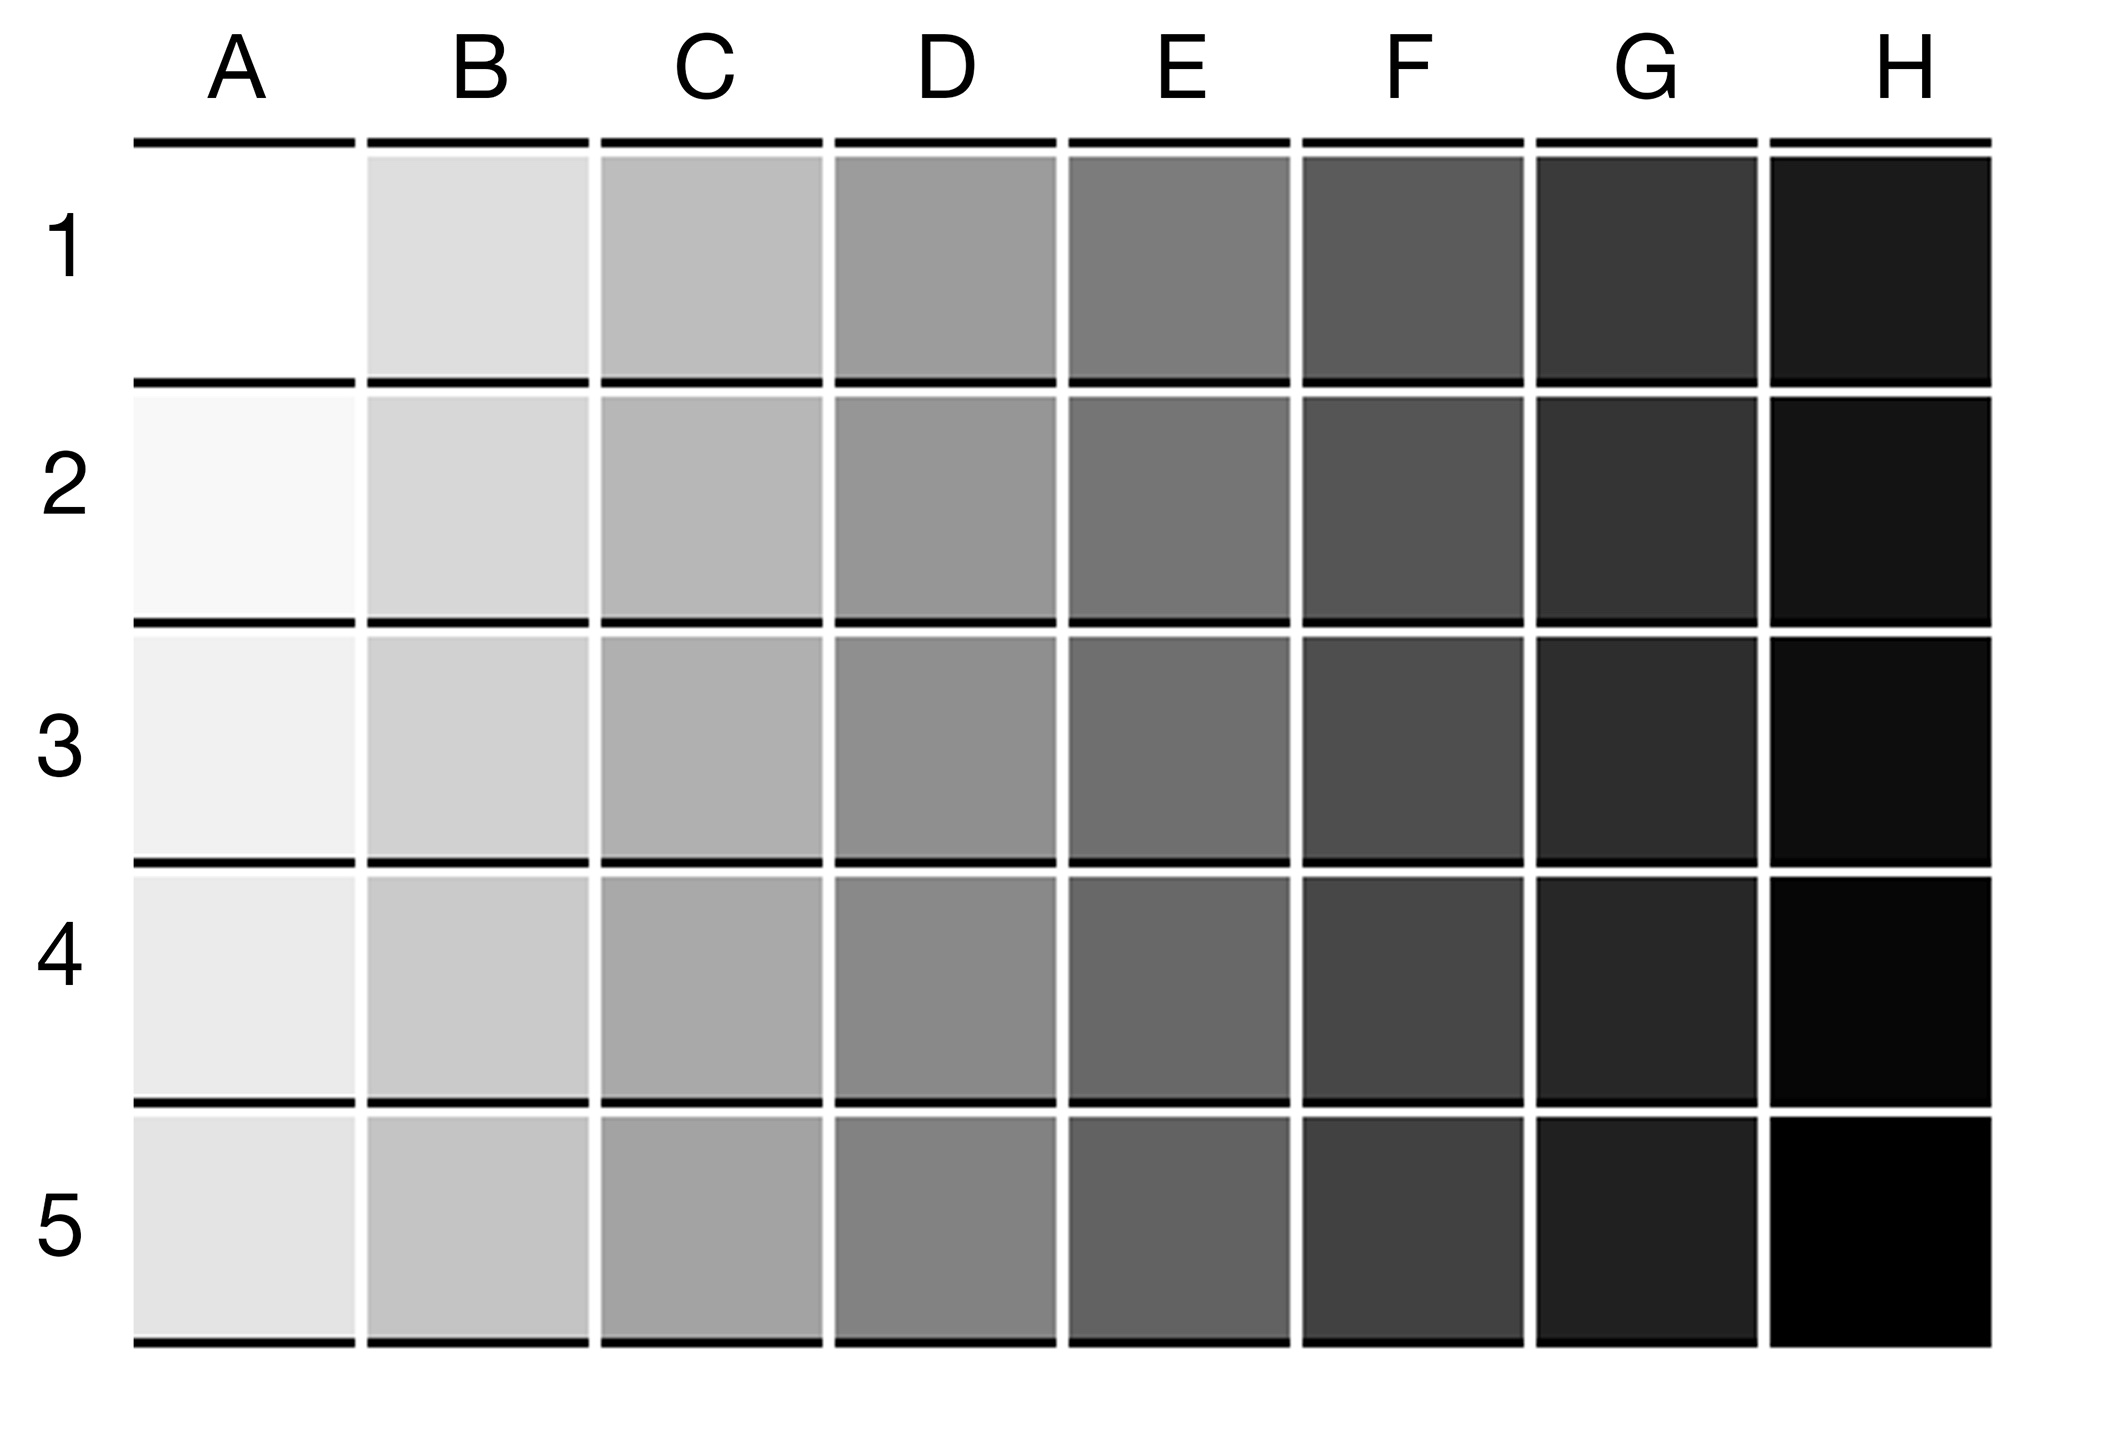
Many of the default test targets used with devices like the X-Rite i1 Pro spectrophotometer have tiny little patches that are difficult to read with the Color Muse. To get around this problem, I have created two step targets with larger patches that print in a roughly 4x6 inch (~Euro A6) area. The 40-step target looks like this:
Both of these untagged .tif files can be downloaded in a zip file by clicking this link.
Do what you do normally do with this target. Go through your workflow to create a negative (or positive) and print it using your desired print process. Dry the resulting print thoroughly, and prepare to make the measurements with one of the following methods:
Record the measurements - Option 1 using my web form
I have created a javascript web-based page that will allow you to enter the data into a data grid on the web page, and then after it has all been entered, allows you to click a button and copy all the data in the proper format to the clipboard on your mac. Just open a new blank plain text document in TextEdit, and paste it in and save it. This little app allows you to record 21 or 40 step target information.
You can access the webpage here.
Record the measurements - Option 2 using Data-Tool
Measure each patch and record the values in a plain text file
Using TextEdit, create a new blank text file. Give it an informative name like ‘First-linearization-attempt.txt’.
Open the Color Muse app on your smartphone and pair with your Color Muse device following the instructions provided by Color Muse. You will probably need to click the little hamburger menu in the upper left corner of the app and specify that you want the device to read out your CIE LAB* color.
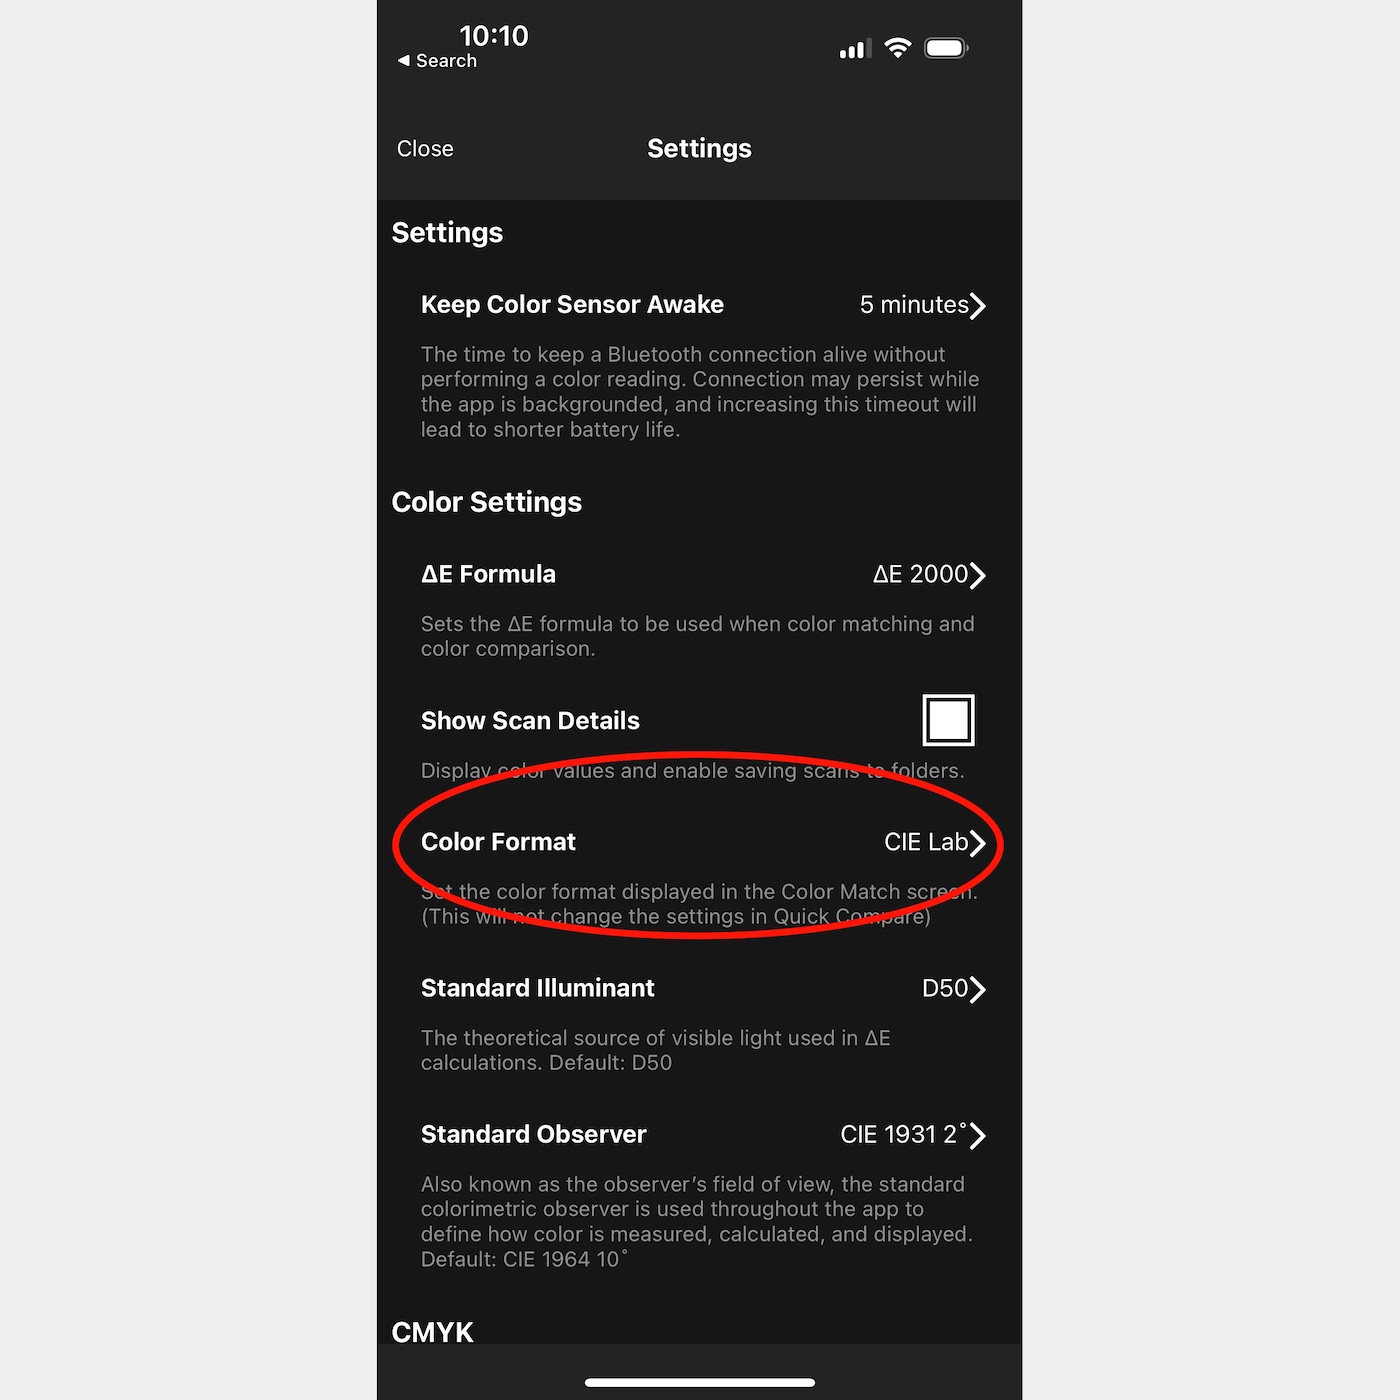
Calibrate the device using the tile that is built into the screw-off cover of the device. Remove the cover and start making measurements of your target.
Read the first patch (Row 1, column A) and read the LAB values from the smartphone app. Type in these values on the first line of the text file, with spaces separating the values. Once the first reading is recorded, hit return to move the cursor in the TextEdit app to the next line, and then make your next measurement (Row 1, column B). Record those LAB values on line two and press return. Proceed in this way until you have measured and recorded all of the patches in the target.
After all the measurements have been made and recorded into the TextEdit file, save it to a place you can easily find on your computer.
Use Data-Tool to smooth the data save the file
If you have not done so already, download and install Data-Tool from the QuadToneRIP website: QTR-Data-Tool. Open up the Data-Tool app, and click on File->Open… and select the text file you just created and saved in a location you will never forget.
The Data-Tool app will open the file and graph the LAB values. It will look like this:
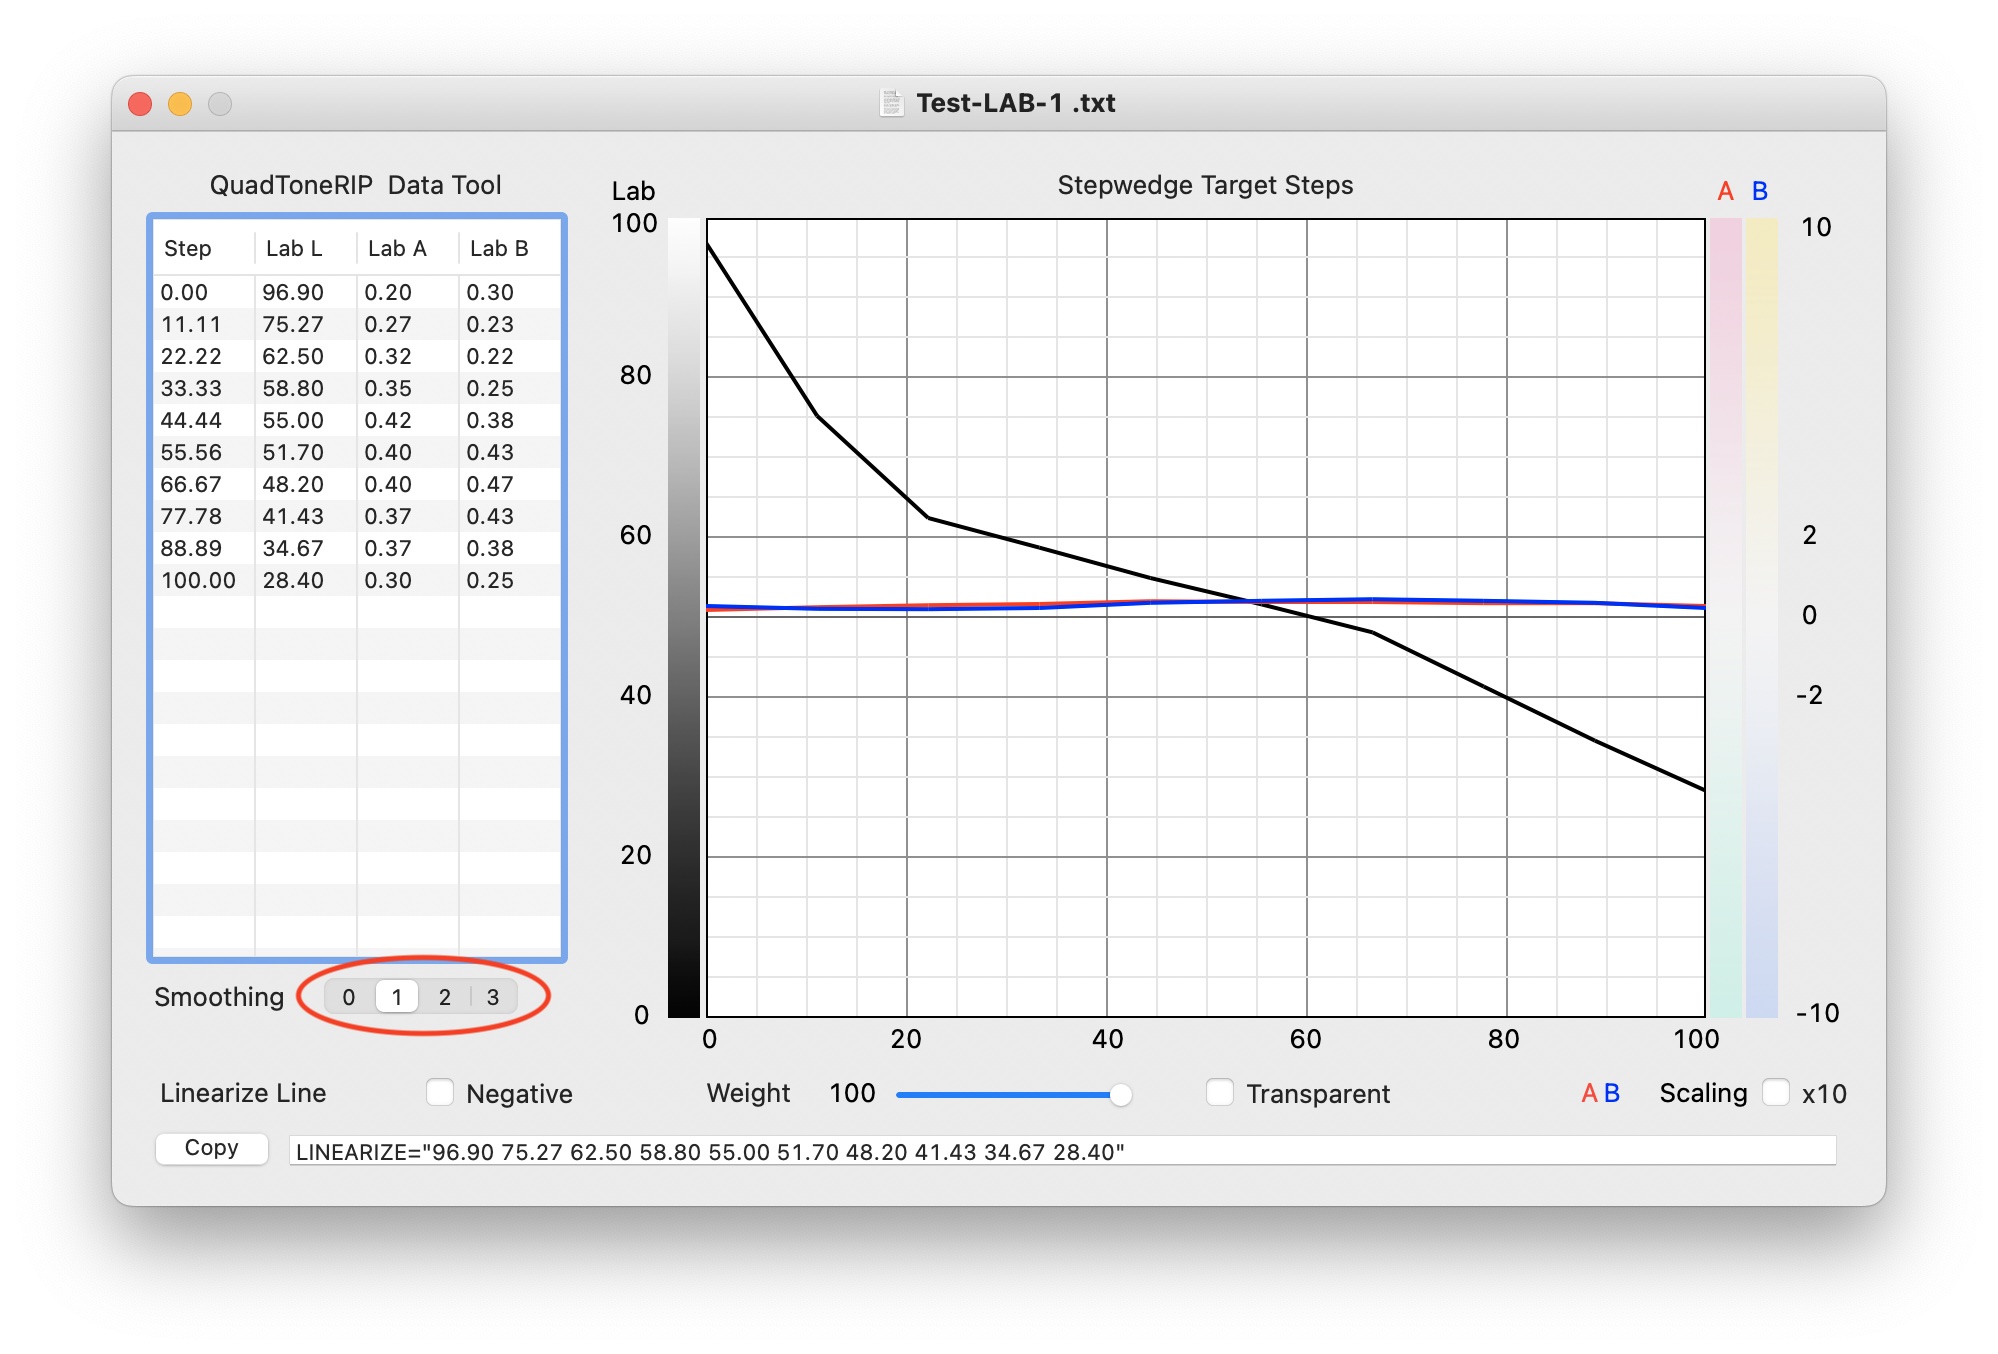
The only decision you need to make now is the degree of smoothing that the Data-Tool application will apply to your measurements. The red-circled set of buttons in the image above is where you select your smoothing choice. Note that the Data-Tool app will resample your data when it is smoothed and either extrapolate or interpolate the data to a fixed number of samples. If you want to use a larger number of samples, Option 1 is a better choice. Click all of them and see the effect each level has on your data. Choose the one that makes you the happiest, and then click on File->Export Data… to open the export dialog box:
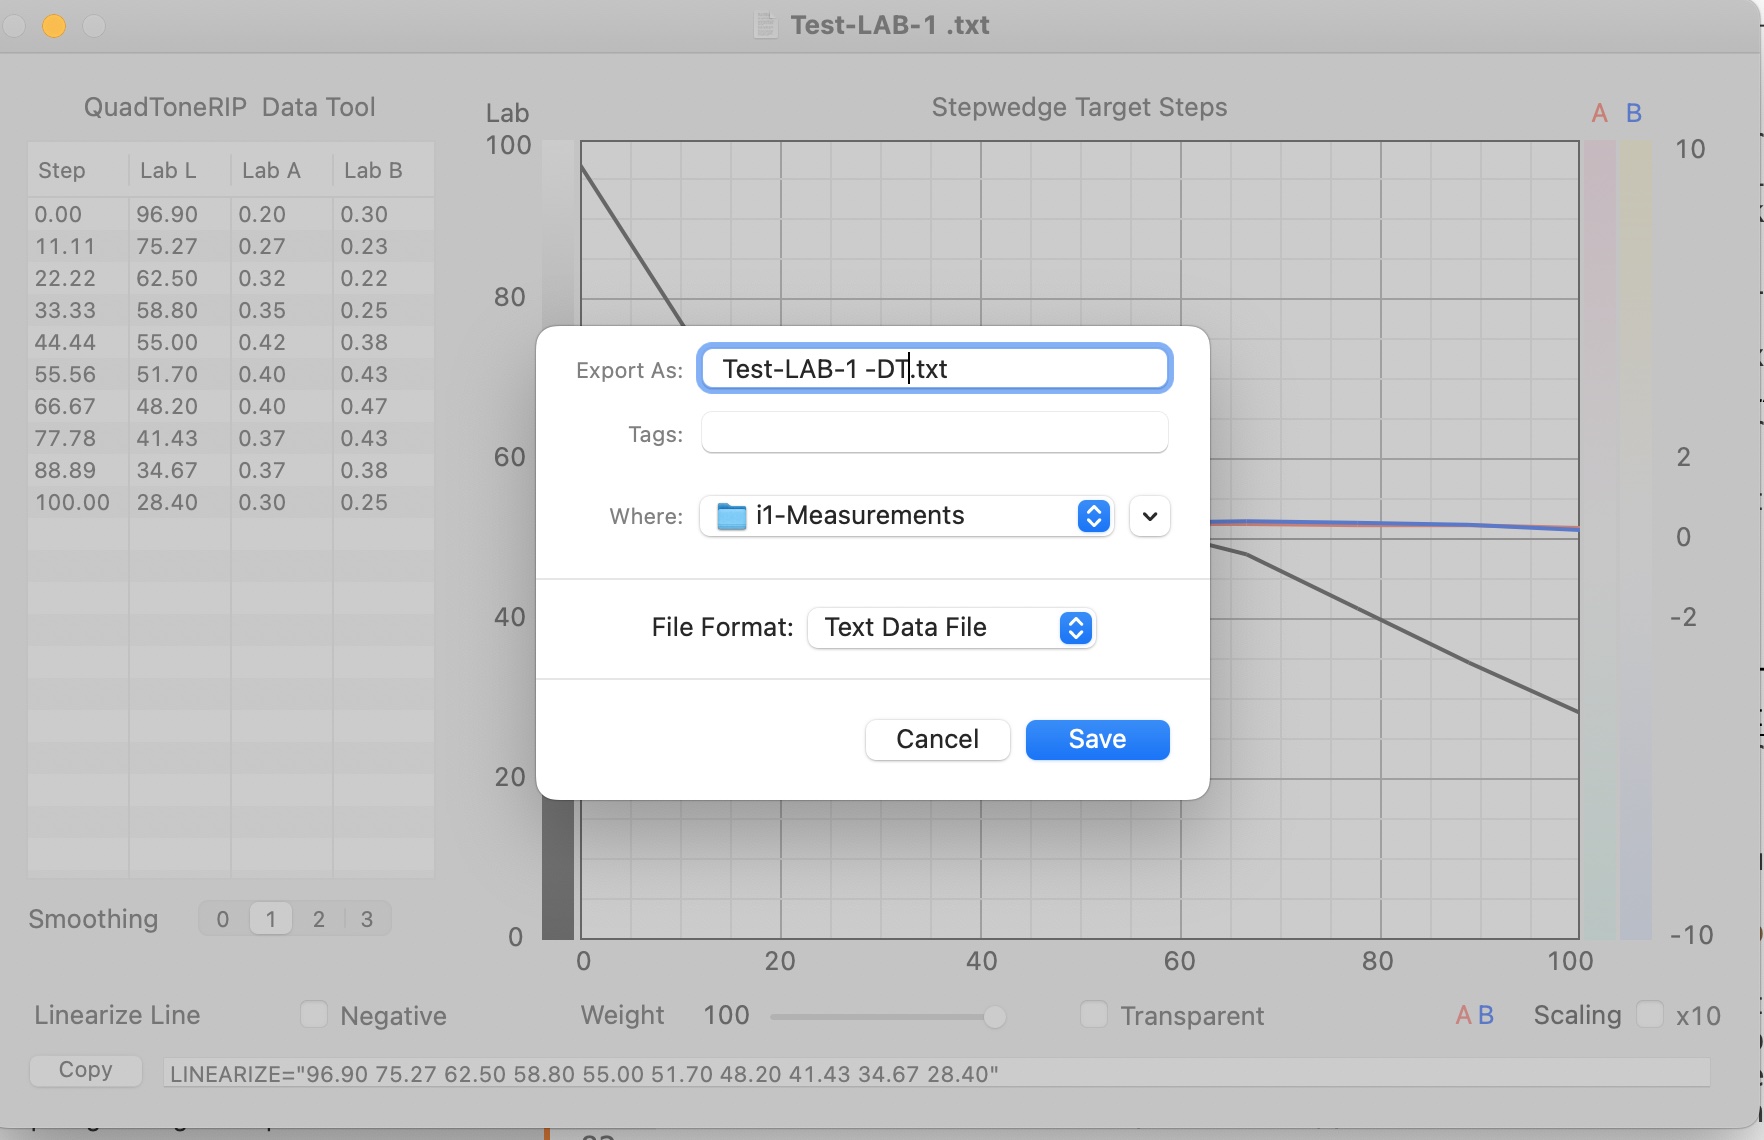
Save the data as a text (.txt) file by choosing the File Format as Text Data File. Modify the file name with something like a ‘-DT’ at the end of the name and save it. The reason you want to save it as a different file is in case you want to go back later and choose a different smoothing level on the original file.
The file you have just created can now be read directly into applications like QuadToneProfiler QuickCurveDN to be used in your linearization steps. It can also be used in other applications that accept a LAB file as a measurement file.
Conclusion
The Color Muse is an inexpensive tool to measure and record LAB measurements to use in digital negative creation workflows. It is much less costly than buying a new X-Rite i1 Pro spectrophotometer.
