
Amazon EC2 server and Statamic
What the Hell?
Why would anyone want to roll their own webserver from scratch? I’ll say up front that even asking the question brands you as a bona-fide member of the techie crowd. But their are some legitimate reasons you might want to do this.
- You can create your own robust security protocols for accessing the server, which in theory reduces the odds of getting hacked
- You can add just the services you want. With a Statamic site for example, you really don’t need to be running a database instance like MySQL or MongoDB.
- You can take advantage of the benefits of so-called ‘cloud’ computing and let a company like Amazon float your server ‘instance’ around its computer infrastructure anywhere in the world.
Requirements
I’ll give a gentle warning here to those who want to embark on this task. It is entirely doable, but it will be at turns difficult, frustrating and obscure. You need to be entirely comfortable with some basic Linux or Unix commands, and have some rudimentary abilities to use the text-based vi text editor. You need to understand the basic plumbing of the internet, and the basics of routing, IP addresses, and what DNS might mean. If you only have a foggy idea about these things, you will be better served using a pre-built webserver solution.
You will also need that ability to create Google searches that are likely to quickly find the solutions to some very specific technical problems. This is an ability that many sys-admins develop as part of their job description. Usually this amounts to no more than understanding what is really relevant to the problem at hand. A google search using Server won’t start is not likely to provide useful results, whereas a search on EC2 apache httpd .htaccess not loading is much more likely to give you relevant results.
The main purpose of this article is to pull together in one place the stuff you will need to know or do to create an Amazon EC2 instance running Statamic. I’ll do a lot of linking to external resources to save myself some effort in documenting every step.
The steps
I am going to go through this step by step. For those who are super savvy and technically inclined, all that may be required is a brief perusal of the sequence of steps in the table of contents here. In many of these steps, I will merely supply a link to some place on the web that outlines the steps you will need to take. I don’t particularly feel like writing additional material that simply rehashes readily available information. If needed, I’ll cover the steps in more detail in paragraphs buried way down the page.
Create an Amazon AWS account
In Jeff Bezos’ fever dreams, everyone in the world has an Amazon account. And you probably do. So go to Amazon Web Services and do whatever they ask you to do to create an AWS account. For simple Statamic sites like this one, just sign up for the free tier, which is likely to be all you will need. The cool thing about AWS is that it can be scaled up as needed. If your website for selling sock monkeys begins to take off, it is not a big deal to scale it upward to account for all the additional traffic you are getting. This page in their documentation is an nice overview of the services that Amazon offers.
The first thing you will be greeted with is their demand that your logins to the AWS section use one of the robust two-part authentication protocols. They can sell you a super-secure hardware-based USB dongle that you use as a second ‘key’ to access your AWS control panel, or you can download an Authenticator app for your smartphone. What the app does is display a set of changing codes that must be typed in for the second part of the login. These codes only last for about 20 seconds and then change. Type in the one that is being displayed on your smartphone or tablet and you will be greeted by your new AWS control panel.
I recommend going through the tutorial here and following the steps to create, in order, a VPC1, a Security Group, and then adding an Elastic IP Address.
Create your Virtual Private Cloud
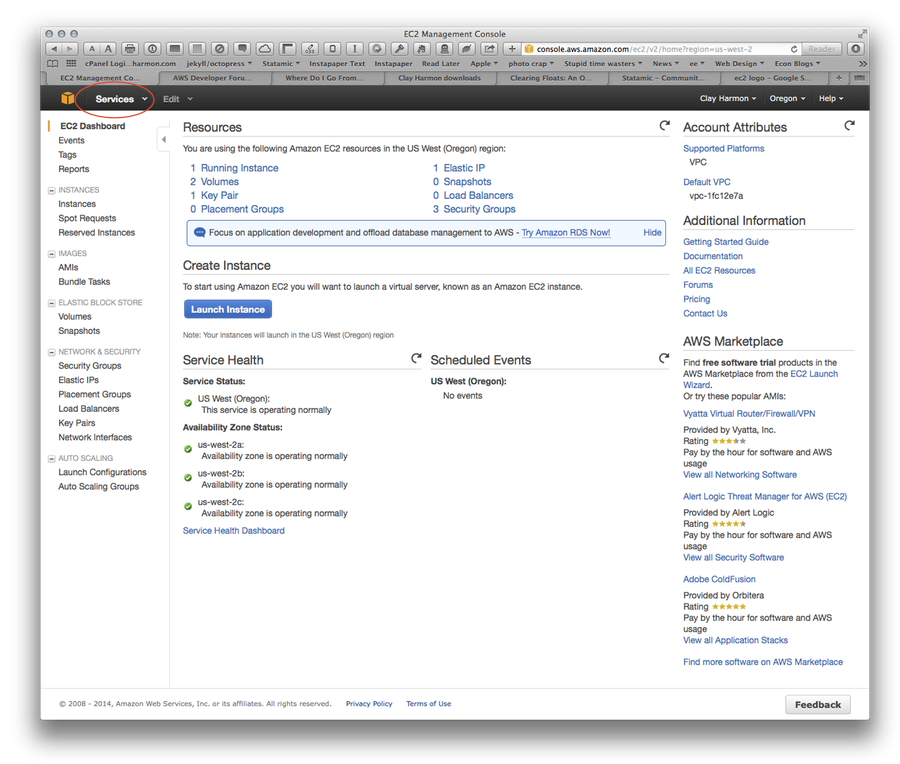
The particular Amazon Web Service you want is EC2, which stands for Elastic Cloud Computing. This is a cool name, or something.
Create a Security Group
First, read this thoroughly. At a minimum, what you will want to do for a Statamic installation is allow HTTP and HTTPS and SSH (and possibly TCP for ftp) inbound rules to your instance. Since you will be serving up HTTP and HTTPS requests, allow then to come from anywhere. If you are really concerned with security and are working from a local computer with a static IP address, you can limit SSH and TCP traffic from only your IP address.
Create keypairs
This step will allow you to create public and private key pairs for you to use on your computer to provide SSH access. This article may help. Make sure you download and save the .pem file you will create in this step. It is essential for allowing SSH and sFTP access to your server !
Launch a server Instance into your VPC
Read this and choose an one of the Amazon Machine Images (AMI) and create a server. I chose the 64-bit AMI 2014.03.1 image, which provides a virtual linux box with nothing configured on it. It uses yum for package installation, which you will become intimately familiar with.
Create an Elastic IP
Read this and associate your server with a publicly accessible IP address. This will the IP address that the world will use to access your Statamic site. It is also the address that will be used when your edit your domain records to point to this server.
setup SSH access from your local computer
Okay, you are going to have to start using the terminal now for a lot of the configuration, and you might as well get started. Google around and find out how to set up SSH access from your particular flavor of computer.
install sFTP support
Login to your server using SSH, and then type in sudo yum install vsftpd.
This step frankly drove me a little nuts. I read this article, and it got me part way there. In a nutshell, you need to configure your /etc/vsftpd/vsftpd.conf file to allow ftp access to ONLY a subset of users. Fire up vi and edit the vsftpd.conf file. I added the following to the bottom of the file, after ensuring that anonymous ftp access is disabled in this file!:
am_service_name=vsftpd
userlist_enable=YES
tcp_wrappers=YES
pasv_enable=YES
pasv_min_port=1024
pasv_max_port=1048
pasv_address=xxx.xxx.xxx.xxx # your elastic IP address goes here
Note: I probably do not need the pasv_ ports enabled since I am using port 22, which is the SSH port for sFTP.
You will now need to create a userlist file that allows only specific groups to use the ftp service. Type in sudo vi /etc/vsftpd/vsftpd.userlist and add your username. I just kept the standard EC2 username which is unsurprisingly ec2-user. It looks like this:
ec2-user. Remember to restart your ftp daemon after all the configuration using the command : sudo service vsftpd restart.
I use Transmit, and I wanted to configure secure FTP (sFTP) access. This article gave me the information I needed.
See if you can access the ftp server from a terminal window and then with transmit. Of course, you will then find that you can view all the directories, but will not have write access to them. I read this article and created a www group that had write access to /var/www/html.
I’m sorry this section is a little thin. Bang on it until it works.
Add php modules
So this is where I had to do some backtracking. I installed a version of apache and php that was not quite as up-to-speed as was supposedly needed by Statamic, so I had to remove and reinstall everything. I am just going to cover what I actually used.
Here is the sequence of yum installs I needed:
sudo yum install httpd24
sudo yum install php54
sudo service httpd start
You can then use your mad new sFTP ability and drop a stupid simple phpinfo.php file with this content <?php phpinfo(); ?>
into the /var/www/html directory and then use a browser to connect to your elastic IP address like so xxx.xxx.xxx.xxx/phpinfo.php. You should see the php information page if everything is plumbed together properly.
Now start adding some modules. I found this article helpful.
sudo yum install gd gd-devel php54-mbstring php54-gd php54-devel php-pear php-curl php-pecl-apc php54-mcrypt
You will need imagemagick installed, which means some crazy ‘build from source’ stuff you will have to do. Read this article all the way down to APC. The Amazon AMI virtual servers are based on CentOS, so any pre-built binaries for that OS may work….
During the build from source for Imagemagick, you will likely get a ‘header file missing’ error. Modify the config.m4 file in the install directory using the answer here, and it should work.
Now you will need to restart the Apache server using sudo service httpd restart.
Edit httpd.conf
The final key for me was getting the httpd daemon to actually read the .htaccess file that Statamic uses to do perform all the url rewriting magic.
So get into the server and use the vi editor to add the following to /etc/httpd/conf/httpd.conf:
<Directory "/var/www">
    AllowOverride All
    # Allow open access:
    Require all granted
</Directory>

# Further relax access to the default document root:
<Directory "/var/www/html">
    Options Indexes FollowSymLinks Multiviews
    AllowOverride All
    Order allow,deny
    allow from all
    Require all granted
</Directory>
Set timezone in php.ini file
You will need to set the timezone in your php.ini file so that all the date functions work properly given your location. You can find out the exact name of your timezone by using the ‘tzselect’ utility in the shell. SSH into your server and type tzselect and follow the prompts. In my case the final answer was America/New_York. Now edit the php.ini file. Type sudo vi =/date.timezone /etc/php.ini into the shell prompt. The cursor for the vi editor will be at the right spot to uncomment the date.timezone setting and add the time zone. Mine looked like this after editing:
[Date]
; Defines the default timezone used by the date functions
; http://php.net/date.timezone
date.timezone = America/New_York
As in all things Apache, restart the server by typing the command sudo service httpd restart at the shell prompt.
Check that your server is ready for Statamic
From Github, download the check.php file that the Statamic folks have created. Use your ftp client to drop into the root /var/www/html directory on your server. Open a browswer and navigate to this file by typing in xxx.xxx.xxx.xxx/check.php into the url bar of the browser (where xxx.xxx.xxx.xxx is your Elastic IP address). You should see a clean bill of health! If there are errors, correct them by either reinstalling needed packages using yum or setting parameters such as the timezone in a configuration file on the server.
See if Statamic runs
Use your ftp client to upload the statamic site to the /var/www/html directory, tidy up your .htaccess file and use a browser to navigate to your elastic IP address. It should come up and run.
-
Virtual Private Cloud ↩