Color Muse 2: new version review
The Color Muse 2 is a new version of an inexpensive handheld colorimeter that allows the photographer making digital negatives and positives the ability to measure LAB values from step tests to be used in programs such as QuadToneProfiler QuickCurveDN.
Overview
The original Color Muse colorimeter proved to be a fantastic inexpensive way to measure LAB values for use in applications that use the information to make digital negatives, digital positives, and polymer intaglio plates.
LAB is a three-factor system for measuring the color of a reflective surface. This system measures Luminance, and an ‘A’(green-magenta axis) and ‘B’(blue-yellow axis) value to uniquely specify the color of a reflective surface. This link is to a Wikipedia article on CIELAB for the terminally curious.
For digital negative creation, we are primarily interested in the L* or Luminance value, which indicates the reflectance of a surface on a scale from 0 to 100, where 0 is a perfectly absorbing black surface that reflects no light and 100 is a non-specular surface the reflects all the light that strikes it.
Unfortunately, I lost my original Color Muse during a workshop in another state, and I needed to replace it. When I went back to the Color Muse site, I noticed that they have a new version called the Color Muse 2 that is slightly more expensive, but according to their specifications should be more accurate than the original Color Muse. The cost is $30 more, but its accuracy is 0.2\(\nabla\)E2000 versus 0.5\(\nabla\)E2000 for the original. This accuracy is the same as their much more expensive spectrophotometers.
For more information about using the Color Muse, please look at my earlier article on the original Color Muse I wrote last year. This article will only review the differences in the device and the new software interface.
Review
Size
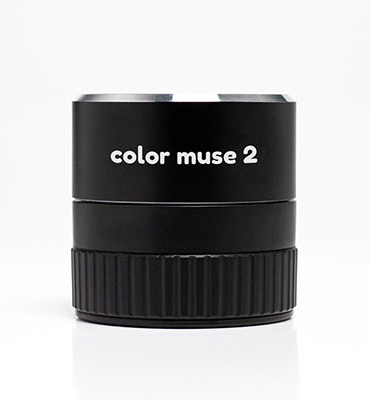
This device is physically larger than the original Color Muse. It has a wider diameter, which can make it a little more challenging to perfectly hit the target square when taking measurements.
Charging
The Color Muse 2 charges the same way with a mini-USB charging cable connected to a USB-A male connector. I suspect this now-anachronistic USB-A port is meant to limit the power delivery to the device because the newer USB-C standard can deliver far more power than the device can probably handle.
Smartphone app
Color Muse has updated its iOS app and the process for taking a measurement is a little more involved than on the previous app.
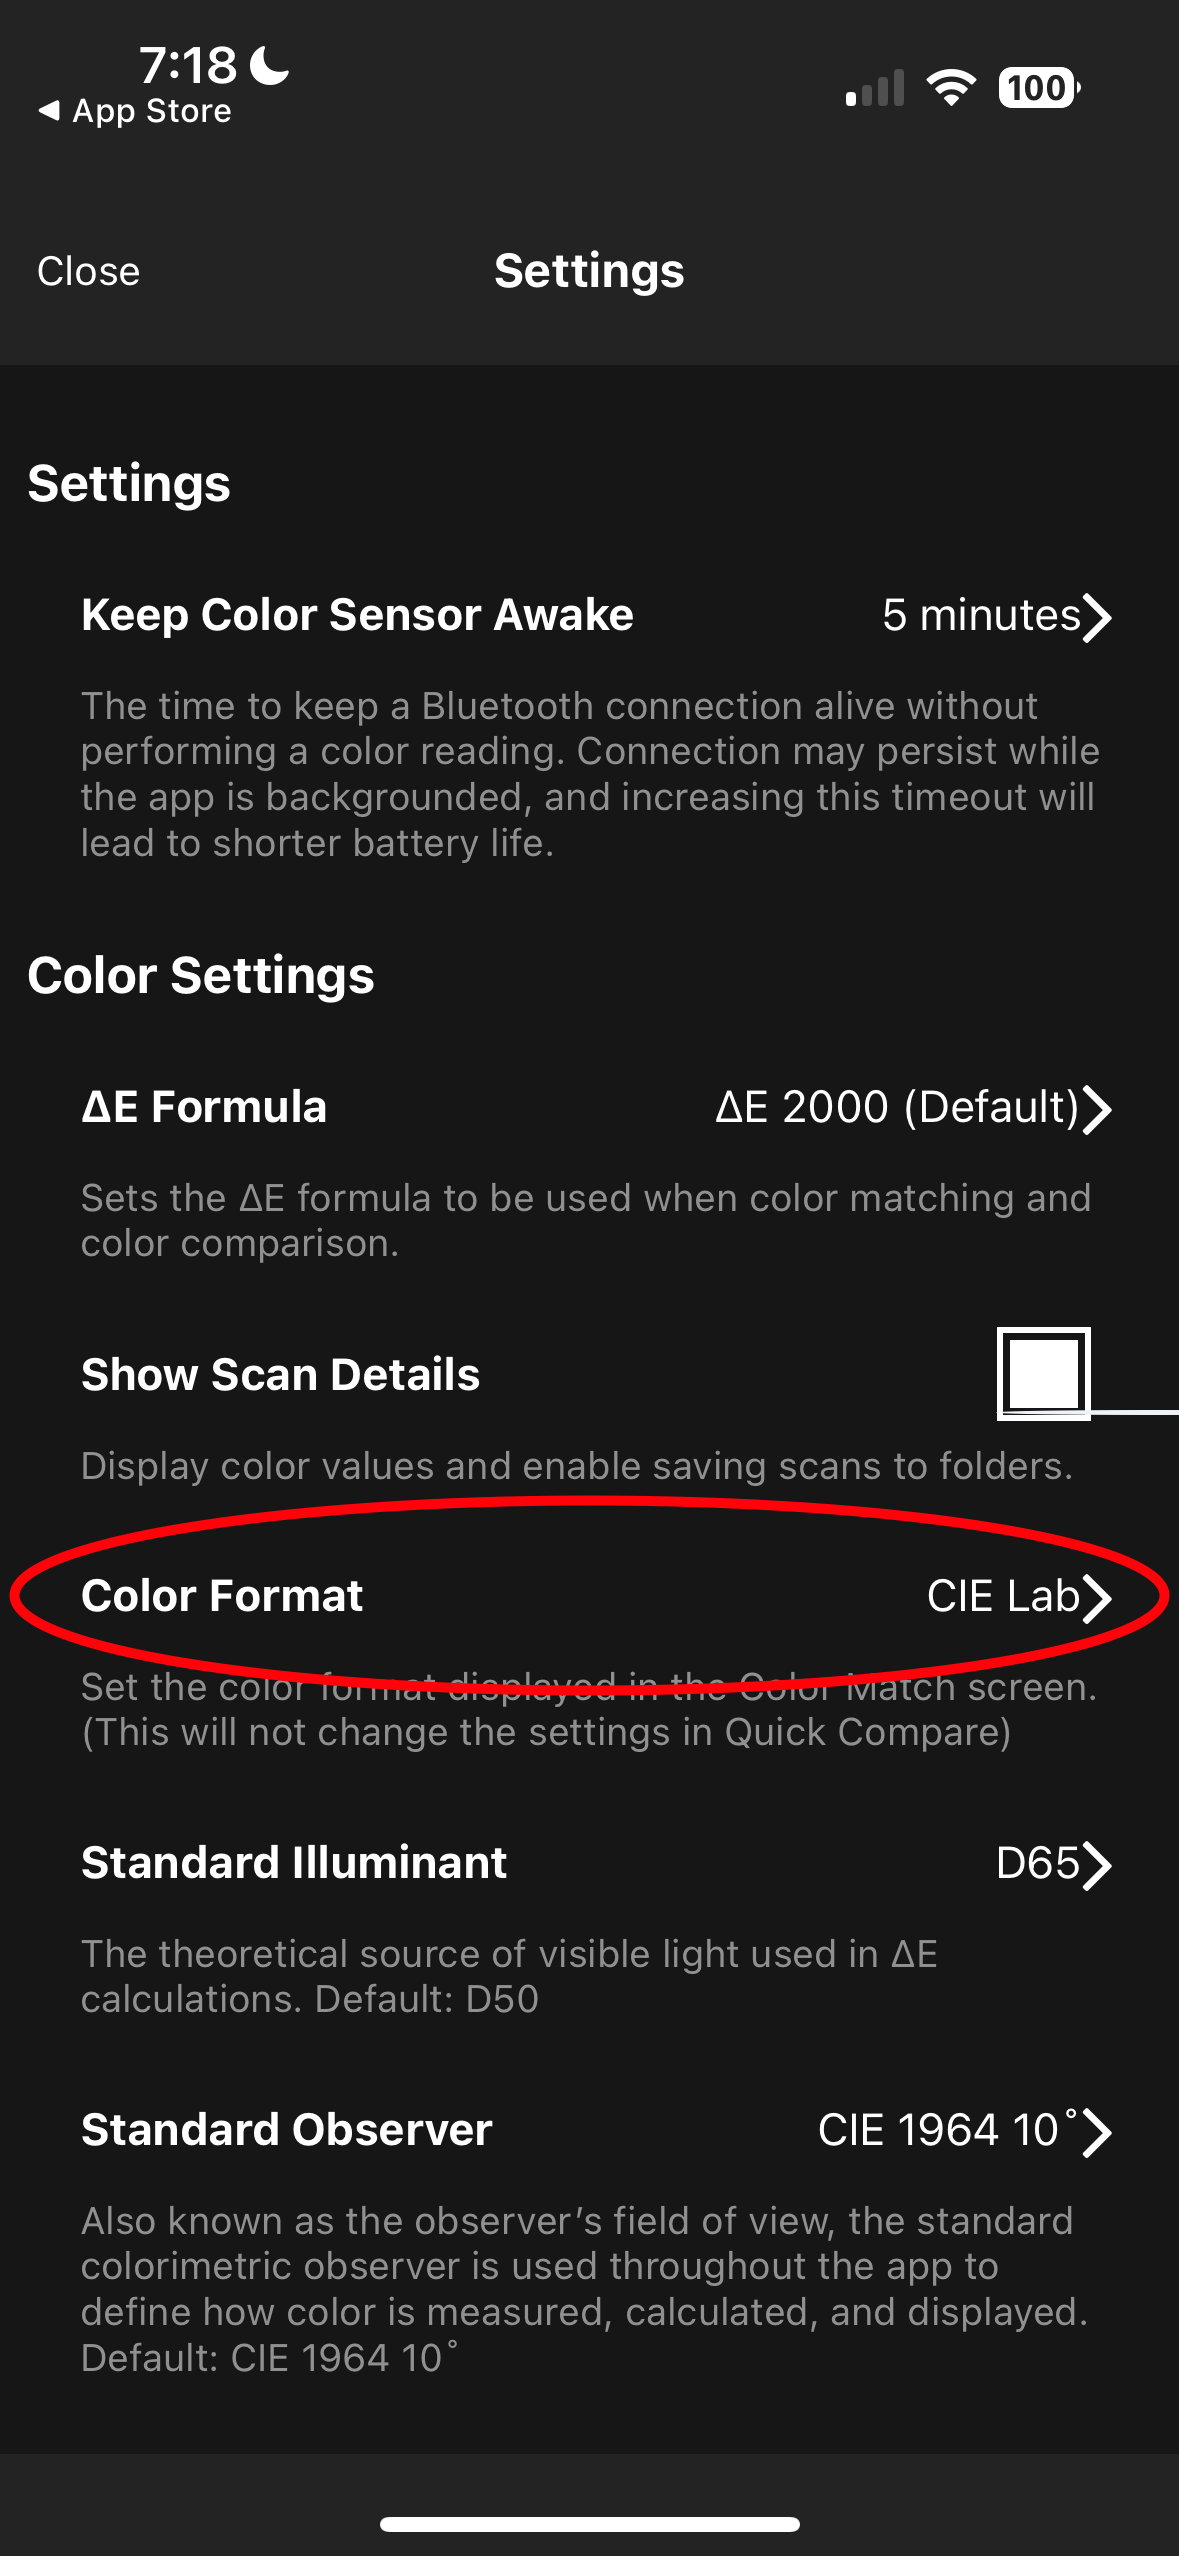
Download the app for Color Muse from the appropriate App Store for your device. Follow the instructions to pair the device via Bluetooth after opening the app. Then click the ‘hamburger’ menu in the upper left corner of the app and select ‘Settings’ and set the Color Format to ‘CIE Lab’.
Use the device calibration procedure to calibrate the Color Muse once it has connected to your phone. The shutter on the bottom of device is closed for this operation. Once the calibration is complete, open the shutter and center the device over the patch you want to read. Press the ‘Scan Now’ button to make the reading.
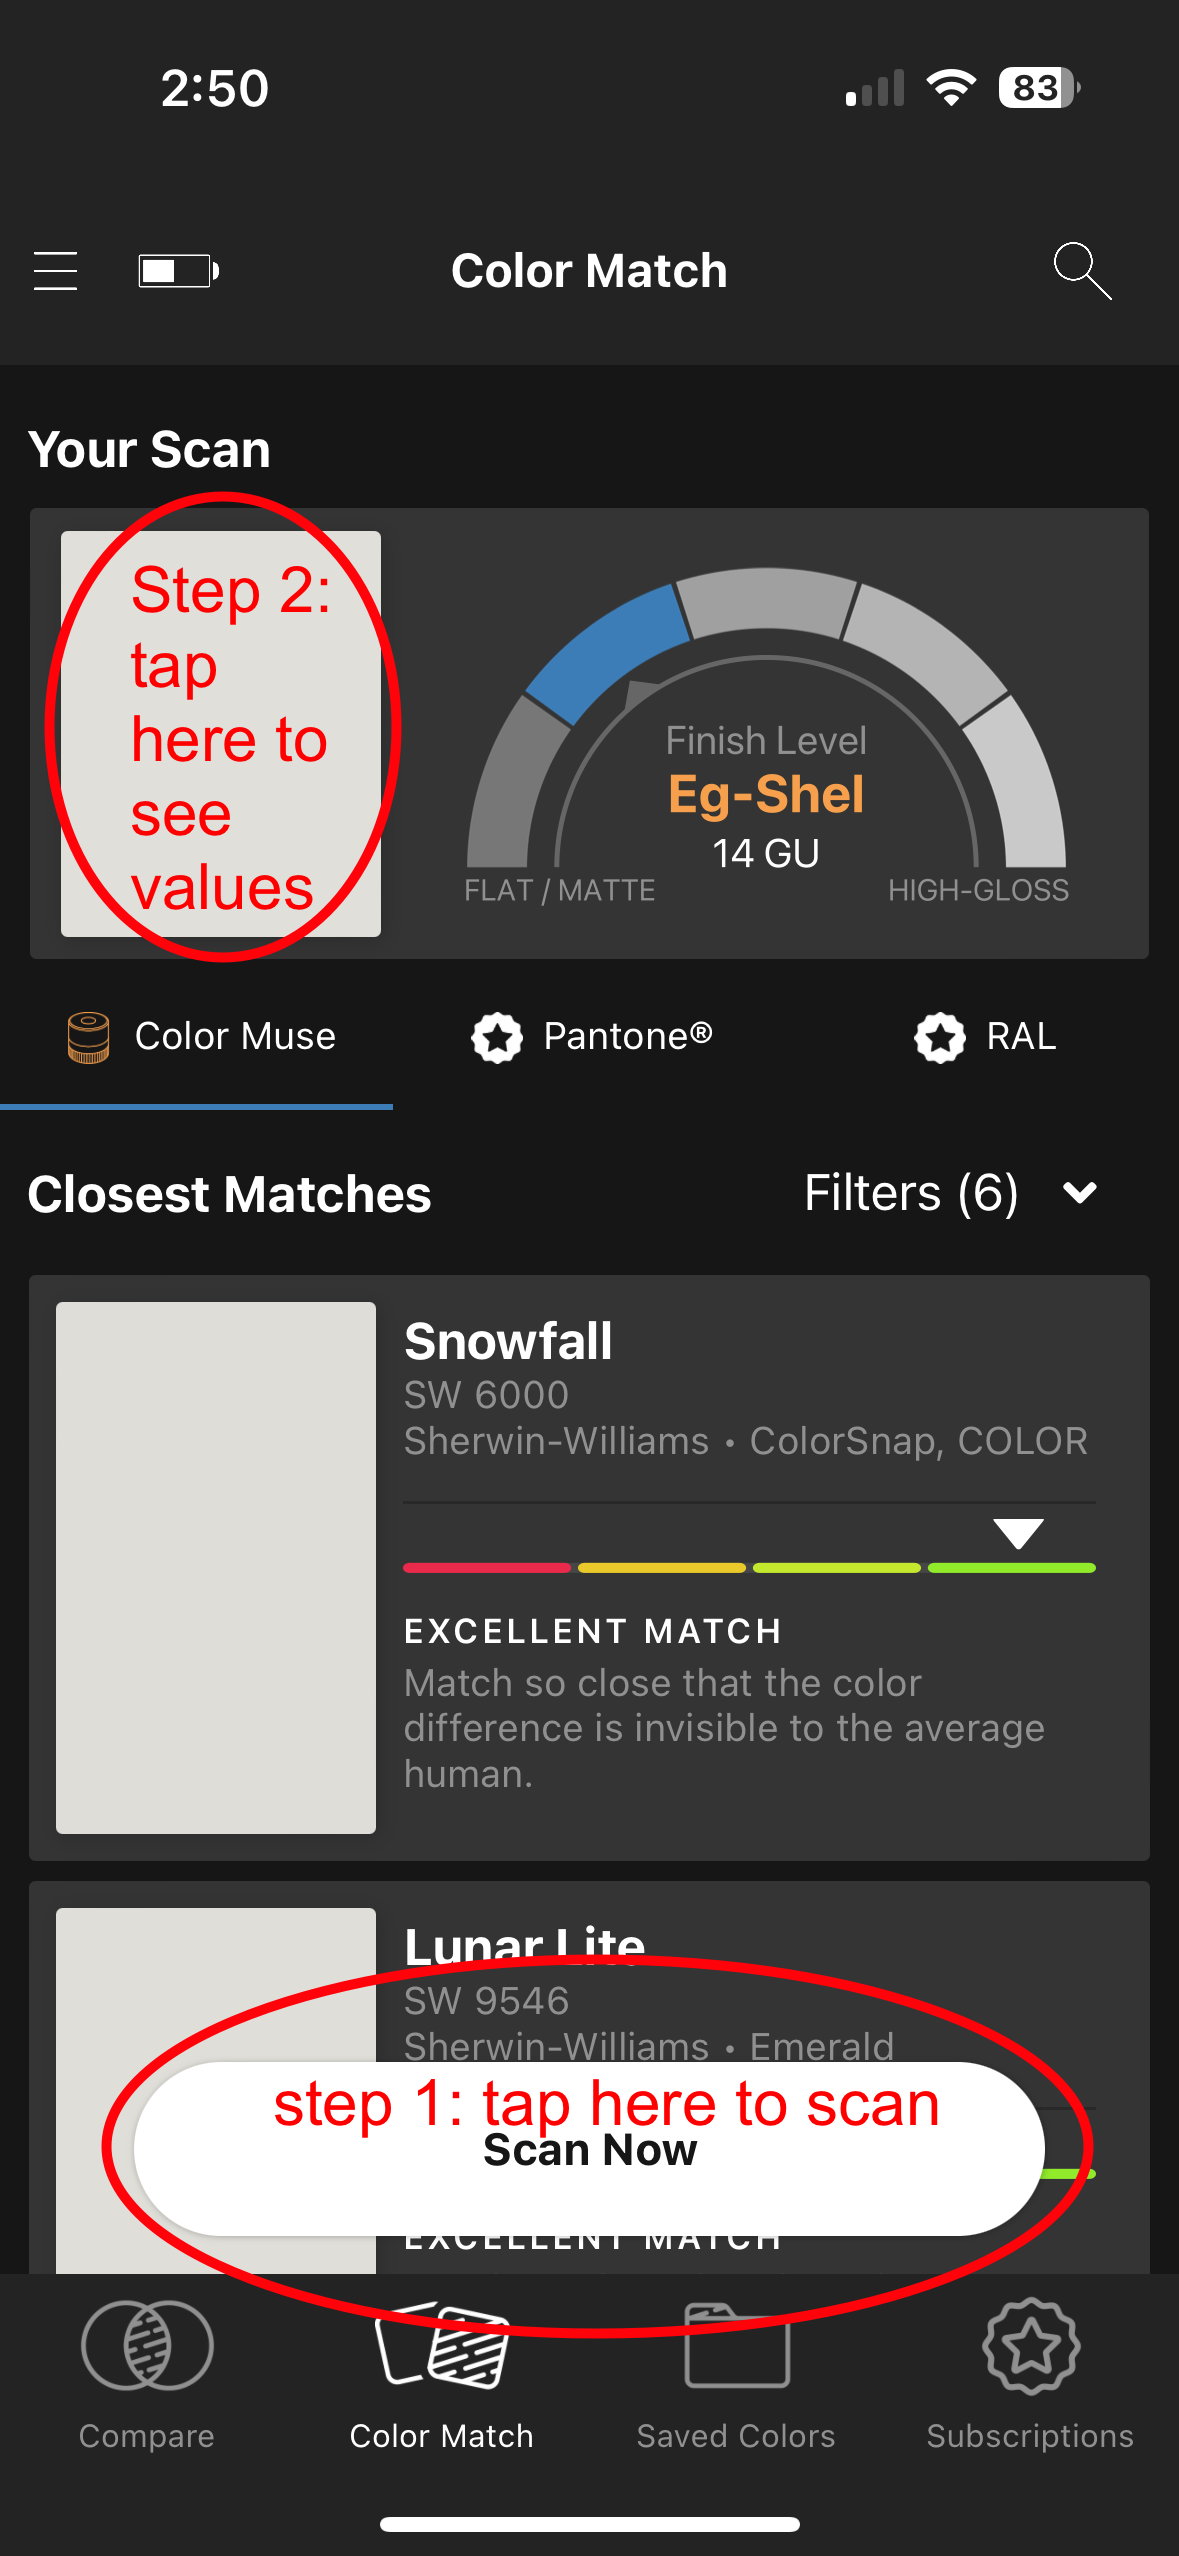
You will see the color of the square at the upper left part of the app screen change to the color of the patch that was just read. To see the LAB values of that patch, you must then tap the patch. This is an extra step from the older version of the app and makes this a little clunky to use.
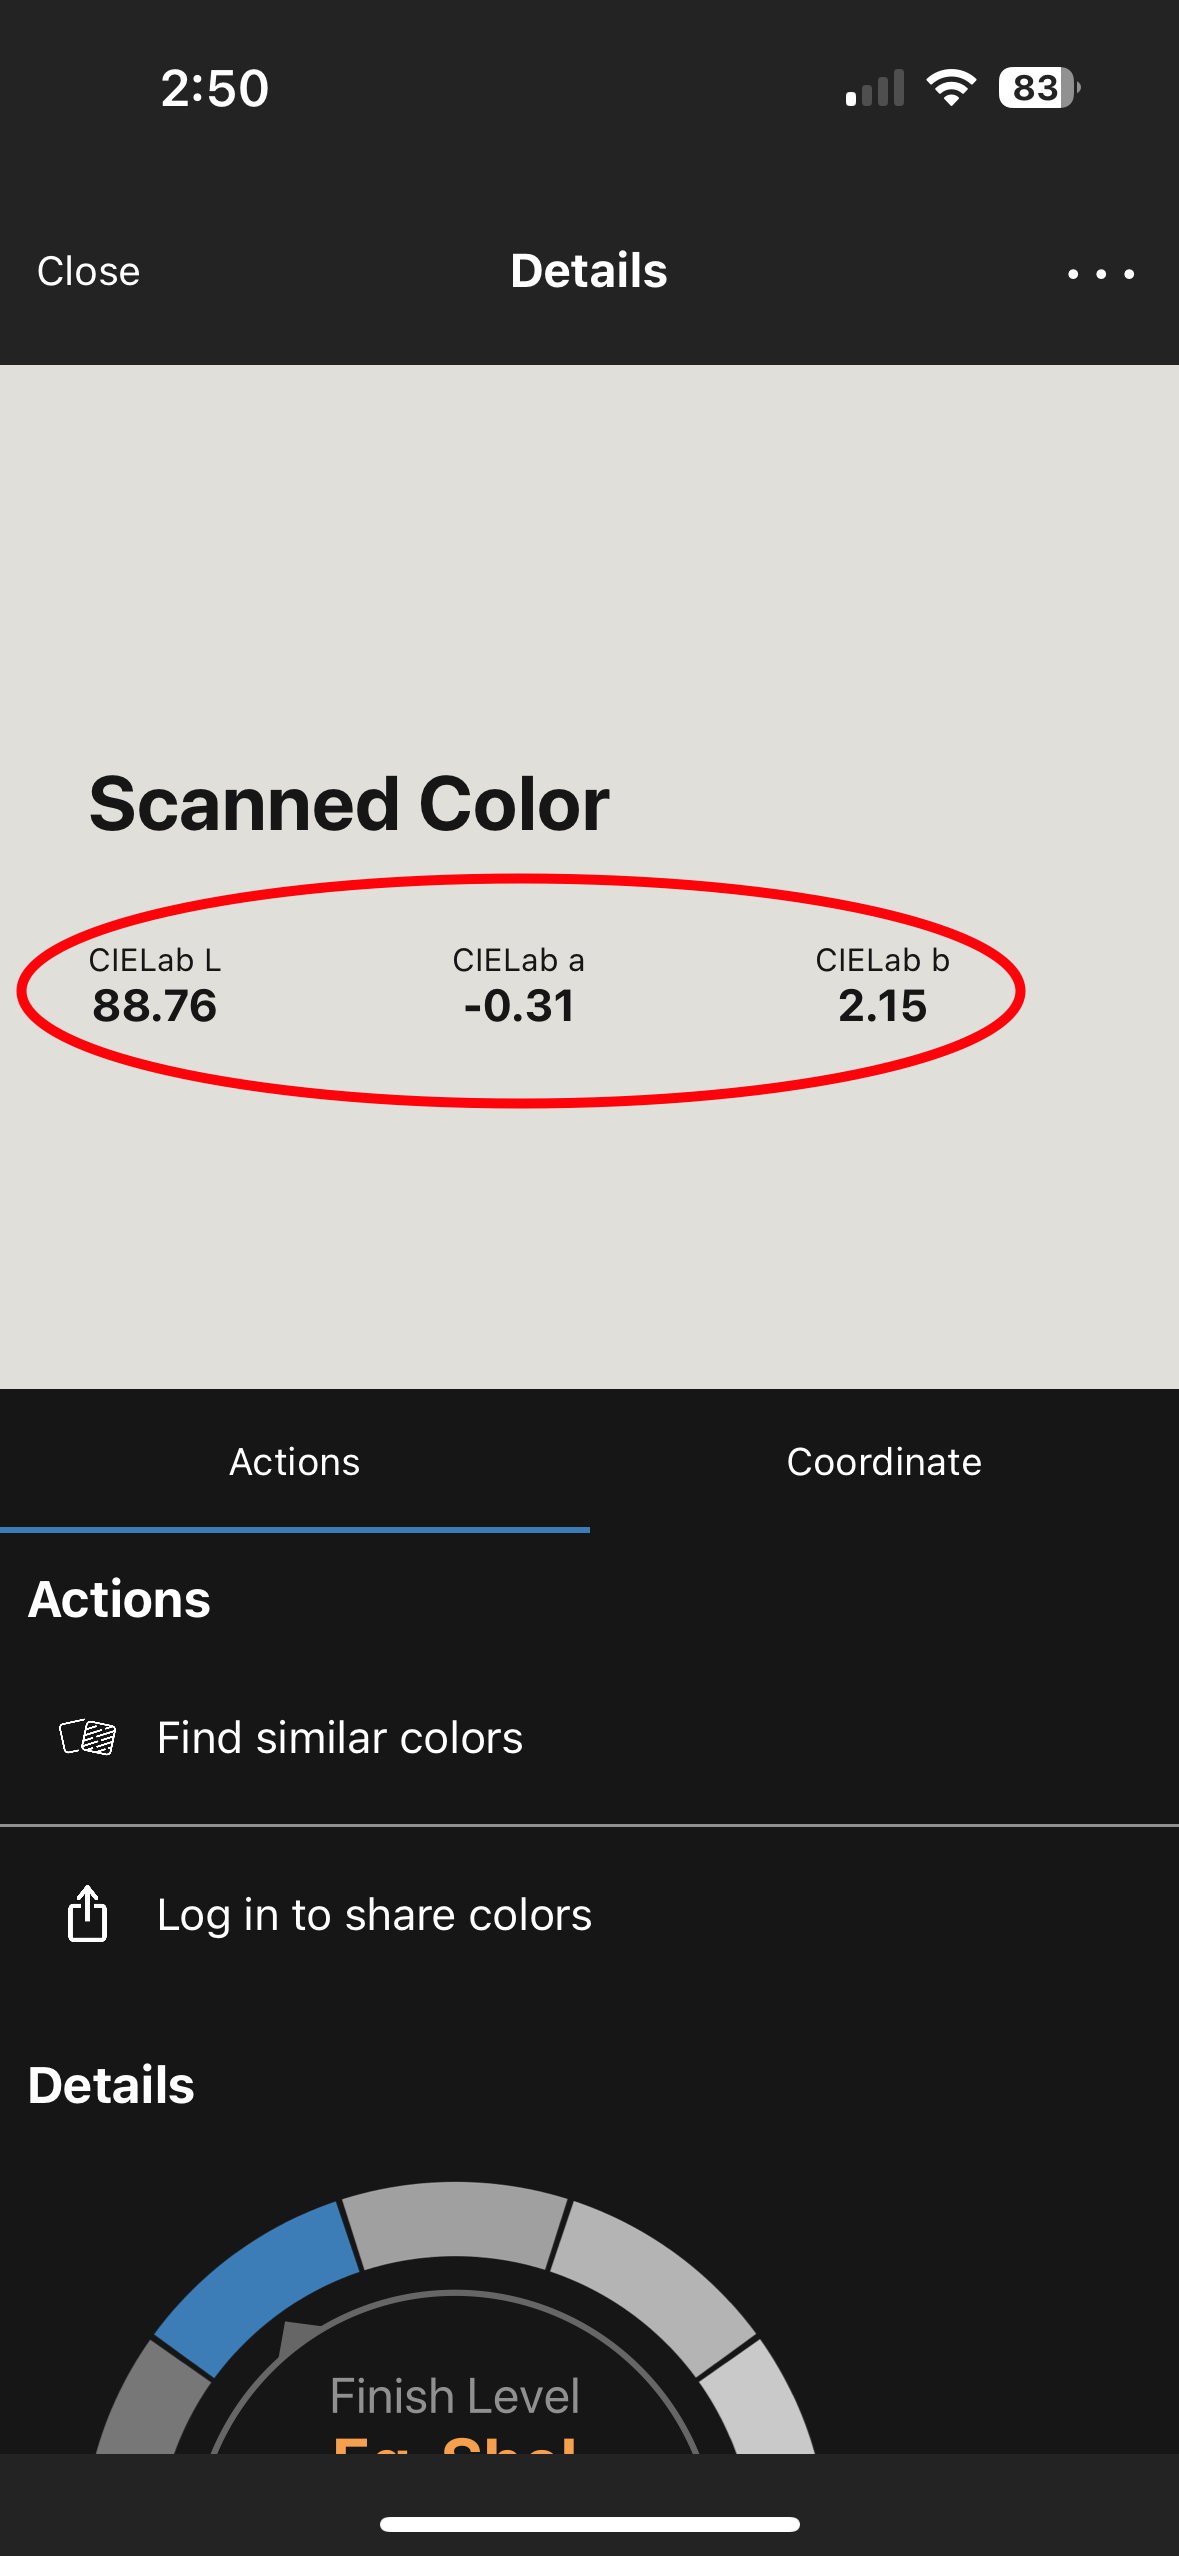
These values must now be entered into your linearization program.
Accuracy
The big improvement that is gained for the additional $30 is the much higher read accuracy of this device.
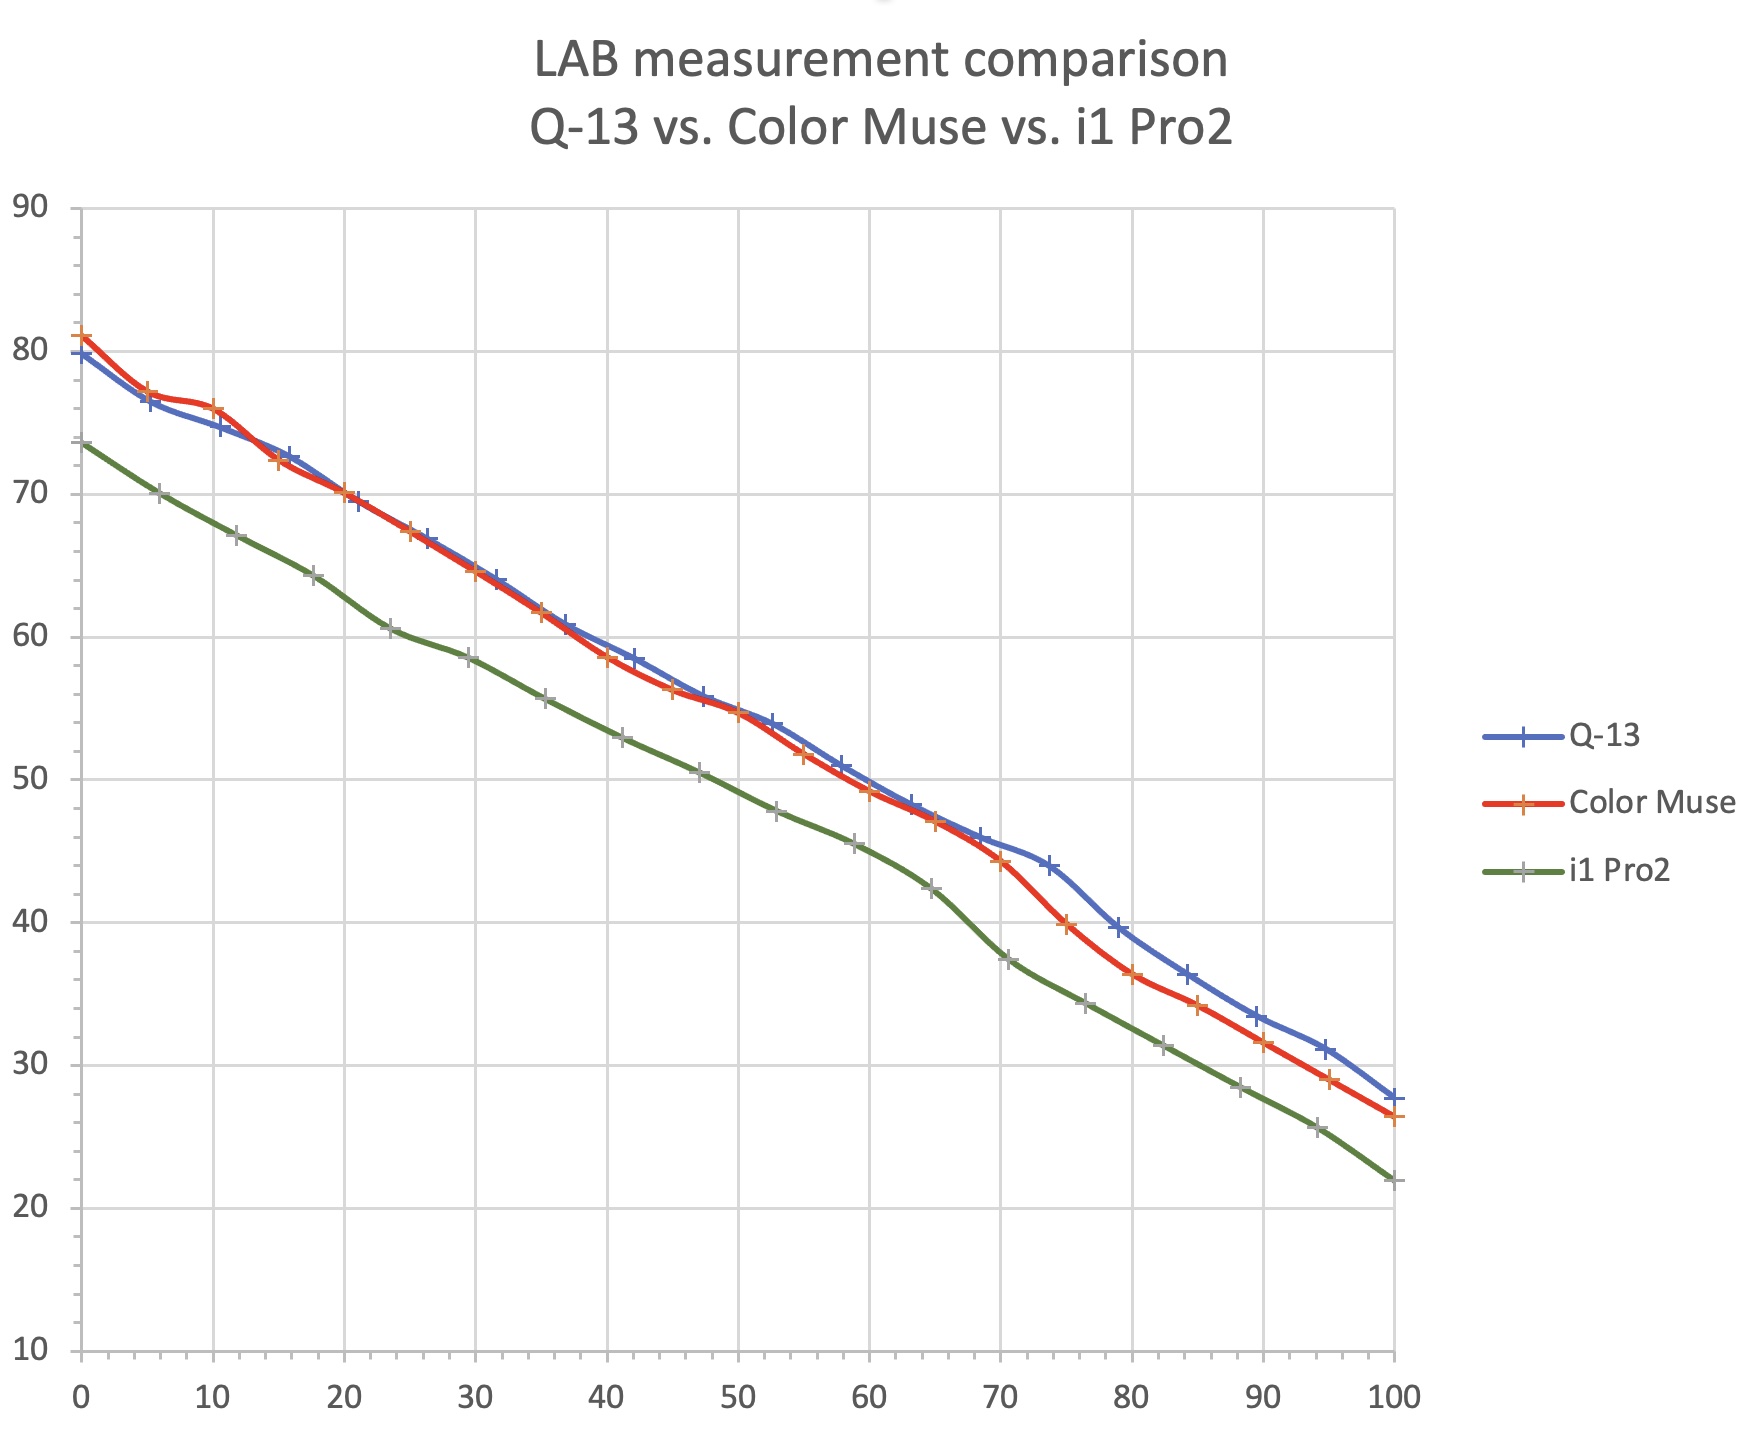
The original Color Muse was precise, but not accurate. The repeatability and linearity of the readings was very good, but the actual values were consistently about 6 L units too high. This did not matter too much because the linearity is the main thing we are interested in for digital negatives. The indicated dMax values it would give were always too low however:
To assess the accuracy of the Color Muse 2, I measured an actual Q-13 target with both the Color Muse 2 and the Xrite i1 Pro2 spectrophotometer. This chart compares the $100 Color Muse 2 with the $1700 Xrite i1 Pro 2 Basic version(the i1 Pro3 basic version is now $1800).
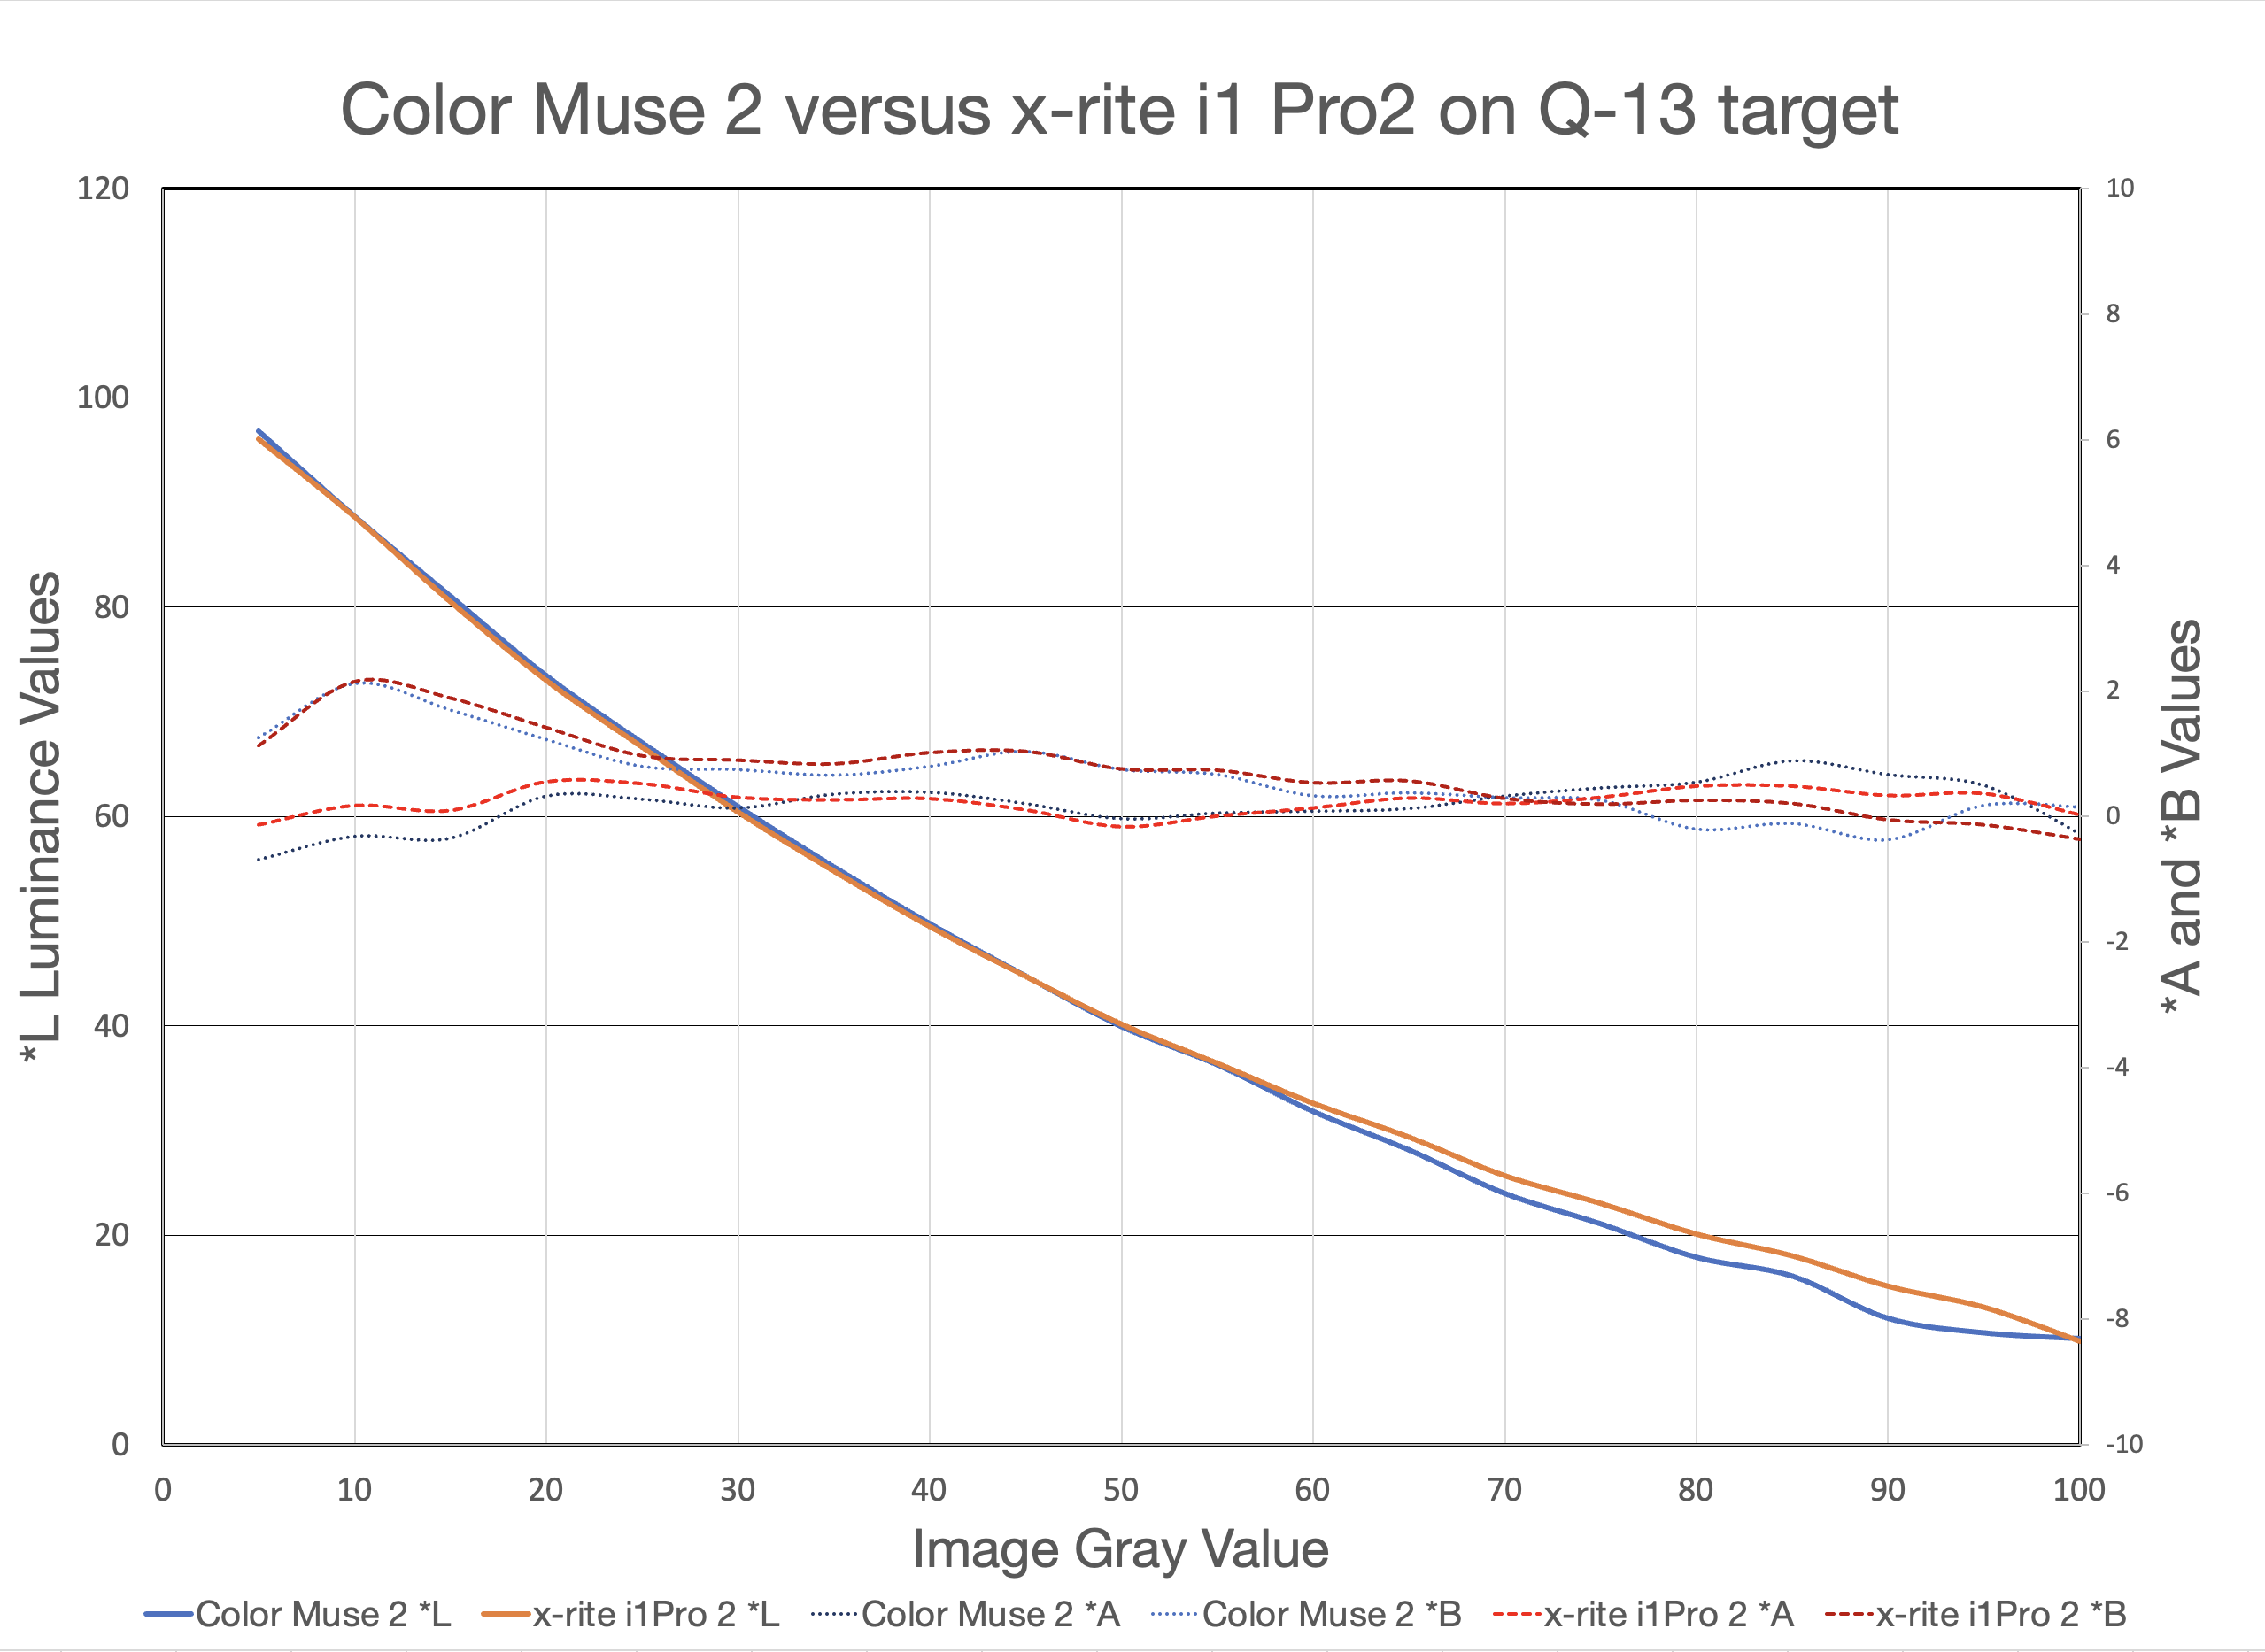
These are outstanding results, and there is virtually no difference between the readings for the two devices. If one were to average a set of 3-5 readings, I would expect the small differences seen in this chart to disappear. This new version of the devices is now both precise and accurate!
Conclusion
The Color Muse 2 is a big improvement in terms of accuracy over the original Color Muse. The largest selling point of this device is, of course, its very low cost. At $100, it is quite a bargain. That low cost does come at the expense of some convenience. It is a little clunky to use because of the two steps required to make a reading, and all the measurements must be recorded manually in either a spreadsheet or the linearization app being used.
That said, this is a fantastic device for the alt-process practitioner who only occasionally needs to calibrate a process. It would be entirely inappropriate for someone trying to do precise color-managed printing workflows and making ICC profile. The idea of making 500-1000 measurements with this device is crazy and the automated patch scanning available in the Xrite i1 Profiler software is the way to go for that purpose.
